Video plus data streaming with racecapture: Difference between revisions
| (48 intermediate revisions by the same user not shown) | |||
| Line 4: | Line 4: | ||
After following this guide, you will have: | After following this guide, you will have: | ||
* 2-camera video with picture-in-picture | * 2-camera video with picture-in-picture | ||
* Rich graphics overlay | * Rich, realtime graphics overlay | ||
* Broadcast to youtube or your preferred streaming provider via an in-vehicle cellular hotspot | * Broadcast to youtube or your preferred streaming provider via an in-vehicle cellular hotspot | ||
* Local video recording | * Local video recording | ||
=System Overview= | |||
Video+data streaming is enabled by using a separate streaming/encoding device. As RaceCapture supports multiple simultaneous connections, an existing dashboard can be retained. | |||
[[image:RaceCapture video+data livestreaming system diagram.png]] | |||
==Cost== | ==Cost== | ||
| Line 12: | Line 16: | ||
==How hard is it to setup?== | ==How hard is it to setup?== | ||
'''This project requires following | '''This project requires following instructions''', including: | ||
* Installing an operating system | * Installing an operating system | ||
* Typing computer commands | * Typing computer commands | ||
| Line 23: | Line 27: | ||
* For those who crave convenience, we will also be offering a pre-packaged setup that take care of most of the setup steps. | * For those who crave convenience, we will also be offering a pre-packaged setup that take care of most of the setup steps. | ||
== | ==Production State== | ||
Since it is based | Since it is based on existing RaceCapture technology (RaceCapture hardware and RaceCapture app), the core of the system is very stable. | ||
New components that add video rendering, encoding, and streaming will be improved through your testing feedback and rounds of updates. | |||
As of this writing, several existing RaceCapture users have put the system through it's paces with great results. | |||
So far we were very pleased with the stability and performance, and we will continue to improve the system through software updates. | |||
Here's the Session from the inaugural test (with sub optimal camera exposure and | ===A demonstration=== | ||
Here's the Session from the inaugural test (with sub optimal camera exposure settings and low quality microphone) | |||
<youtube>zVUJwnGoCnI&t=2990s</youtube> | <youtube>zVUJwnGoCnI&t=2990s</youtube> | ||
| Line 37: | Line 44: | ||
While we consider this '''experimental''' - it is also a free software upgrade for a system that was never originally designed for this purpose. | While we consider this '''experimental''' - it is also a free software upgrade for a system that was never originally designed for this purpose. | ||
With your testing help we can | With your testing help we can steadily improve it and ultimately provide an incredibly cost effective yet very full-featured and high performance system that rivals solutions costing upwards of $5000 USD. | ||
=Parts you will need= | =Parts you will need= | ||
| Line 56: | Line 59: | ||
===Recommended=== | ===Recommended=== | ||
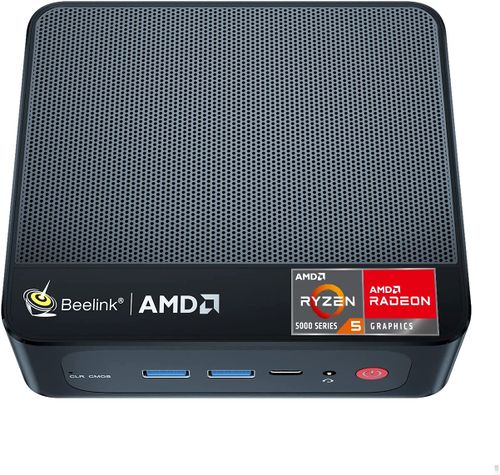
* [https://www.amazon.com/gp/product/B0BCVCZDH3 Beelink SER5] | * [https://www.amazon.com/gp/product/B0BCVCZDH3 Beelink SER5] | ||
The Beelink SER5 is our recommended choice as it is powerful, cost effective, and | The Beelink SER5 is our recommended choice as it is powerful, cost effective, and provided in a compact and lightweight form factor. | ||
[[image:beelink_ser5_micro_pc.jpg|500px]] | [[image:beelink_ser5_micro_pc.jpg|500px]] | ||
===Alternatives=== | ===Alternatives=== | ||
A micro system with an Intel I5-6500 through I5-7600 + SSD + 8GB RAM is an acceptable option as well. This may be a system you already have or a surplus system you can get at minimum cost. | A micro system with an Intel I5-6500 through I5-7600 + SSD + 8GB RAM is an acceptable option as well. This may be a system you already have or a surplus system you can get at minimum cost. | ||
| Line 72: | Line 76: | ||
==12v DC to DC converter== | ==12v DC to DC converter== | ||
A 12v-19v DC to DC converter is needed to power the rendering/broadcasting computer in the vehicle. This converter avoids needing an AC inverter in the car, | A 12v-19v DC to DC converter is needed to power the rendering/broadcasting computer in the vehicle. This converter avoids needing an AC inverter in the car, making for a clean installation. | ||
* '''Tips''': | * '''Tips''': | ||
** Choose a device that has sufficient power capacity (100W minimum) | ** Choose a device that has sufficient power capacity (100W minimum) | ||
| Line 79: | Line 83: | ||
* [https://www.amazon.com/gp/product/B07TT2F95L KFD 100W universal car charger] | * [https://www.amazon.com/gp/product/B07TT2F95L KFD 100W universal car charger] | ||
[[image:KFD-100W-DC-to-DC-converter-12v-to-19v.jpg|500px]] | [[image:KFD-100W-DC-to-DC-converter-12v-to-19v.jpg|500px]] | ||
* | * '''Tips''': | ||
** We recommend cutting the cigar lighter connection and hard-wiring the power to a 15A circuit. (center conductor is positive). | ** We recommend cutting the cigar lighter connection and hard-wiring the power to a 15A circuit. (center conductor is positive). | ||
==Cameras== | ==Cameras== | ||
You will need 1 or 2 cameras for capturing and rendering video. | You will need 1 or 2 cameras for capturing and rendering video. | ||
===Recommended | ===Recommended Camera Kit=== | ||
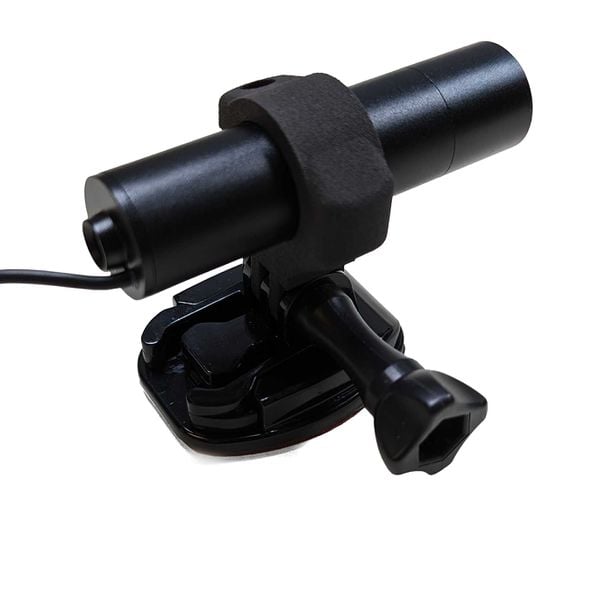
Autosport Labs will soon provide a camera kit that provides high quality imaging, a | Autosport Labs will soon provide a camera kit that provides high quality imaging, a compact and ruggedized IP65 form-factor, and the perfect 110 degree field of view. | ||
[[image:RaceCapture_video+data_livestreaming_windshield_mount.jpg|600px]] | |||
[[image:RaceCapture_video+data_livestreaming_gopro_camera_mount.jpg|600px]] | |||
===Assembling the Camera Kit=== | |||
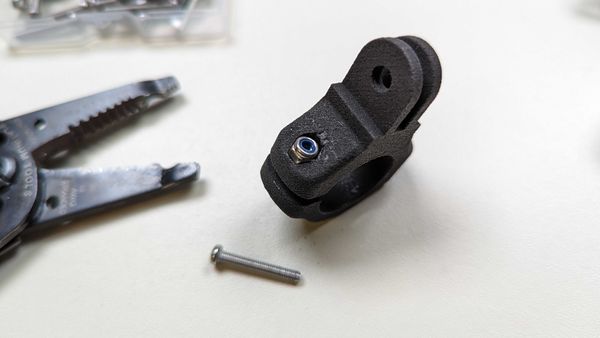
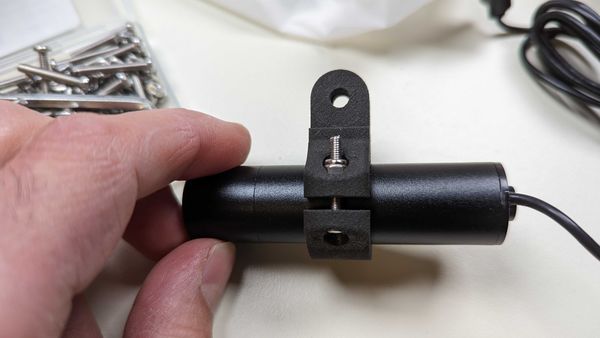
Using the supplied hardware, insert the nut into the camera clamp using a pair of small pliers. Then, use the included screw to clamp the camera to the mount. | |||
[[image:RaceCapture_video+data_livestreaming_gopro_camera_mount_clamp_insert_nut.jpg|600px]] | |||
[[image:RaceCapture_video+data_livestreaming_gopro_camera_mount_clamp_screw_attached.jpg|600px]] | |||
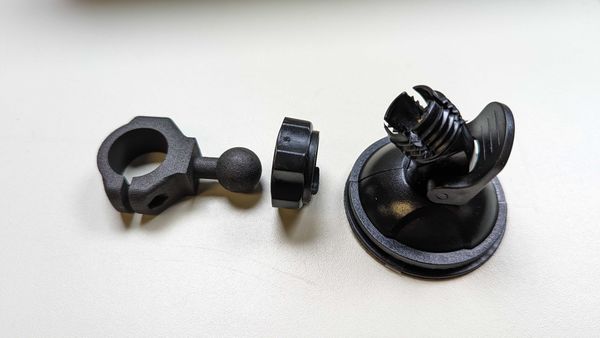
Then, assemble the camera clamp into ball and socket windshield mount, or the GoPro mount. (1 of each style is included in the kit) | |||
====Ball and Socket windshield mount==== | |||
[[image:RaceCapture_video+data_livestreaming_gopro_camera_mount_clamp_ball_and_socket_mount.jpg|600px]] | |||
[[image:RaceCapture_video+data_livestreaming_gopro_camera_mount_clamp_ball_and_socket_mount_assembled.jpg|600px]] | |||
====GoPro style mount==== | |||
[[image:RaceCapture_video+data_livestreaming_gopro_camera_mount.jpg|600px]] | |||
===Alternatives=== | ===Alternatives=== | ||
Most any USB camera (such as a webcam) can be used. These are commonly found on [https://www.amazon.com/s?k=usb+webcam Amazon] or [https://www.ebay.com/sch/i.html?_nkw=usb+webcam&_sacat=0 Ebay]. | Most any USB camera (such as a webcam) can be used. These are commonly found on [https://www.amazon.com/s?k=usb+webcam Amazon] or [https://www.ebay.com/sch/i.html?_nkw=usb+webcam&_sacat=0 Ebay]. | ||
| Line 100: | Line 124: | ||
** Analog microphone - you can use an analog microphone that attaches to the front headset input of the micro PC. Make sure you get a microphone that has the 4-ring connector for proper operation. | ** Analog microphone - you can use an analog microphone that attaches to the front headset input of the micro PC. Make sure you get a microphone that has the 4-ring connector for proper operation. | ||
** Microphone embedded in one of the cameras - if one of your your cameras has its own microphone, you can use that as an audio source. | ** Microphone embedded in one of the cameras - if one of your your cameras has its own microphone, you can use that as an audio source. | ||
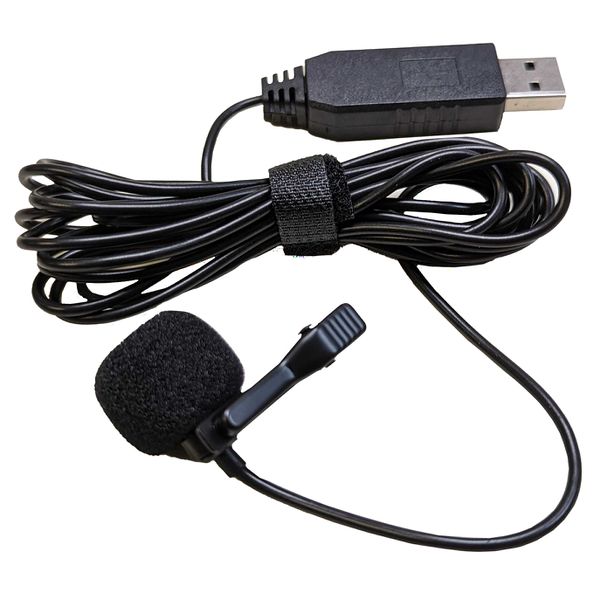
===Using the Microphone included with the kit=== | |||
The kit provides a USB microphone with good audio quality. | |||
[[image:RaceCapture_video+data_livestreaming_microphone.jpg|600px]] | |||
==Display Emulator== | |||
You'll need a display emulator to plug into the streamer while running on track. This tricks the computer into thinking a monitor is attached, allowing the streamer to run. | |||
[[image:hdmi_display_emulator.jpg|300px]] | |||
The following have been tested: | |||
* [https://www.amazon.com/gp/product/B06XSY9THQ HDMI emulator] - use this for the Beelink Micro PC | |||
* [https://www.amazon.com/gp/product/B075PTQ4NH DisplayPort emulator] - use this for the HP or Dell Micro PCs | |||
==Hotspot/Router== | ==Hotspot/Router== | ||
Most any hostspot should work, but for the best performance and reliability, these options should be considered: | Most any hostspot should work, but for the best performance and reliability, these options should be considered: | ||
* Hard-wired ethernet connection, for direct connection to the micro computer. | * Hard-wired ethernet connection, for direct connection to the micro computer. | ||
* External antenna connection - a hotspot that offers external antenna will boost performance by allowing you to use a high-gain roof-mount antenna. | * External antenna connection - a hotspot that offers external antenna will boost performance by allowing you to use a high-gain roof-mount antenna. | ||
Suggested units that offer direct hardwired connection: | |||
* [https://www.amazon.com/NETGEAR-Broadband-Modem-LM1300-Always/dp/B0BKTSMQFF Netgear LM1300] | |||
* [https://www.amazon.com/Teltonika-RUT950-LTE-4G-Router/dp/B00TKFKLCI Teltonika RUT950] | |||
* [https://www.amazon.com/Peplink-Pepwave-Cellular-Router-MAX-BR1-MINI-LTE-US-T/dp/B01MR5YKF9 Pepwave BR1] | |||
=Setup= | =Setup= | ||
Connect a keyboard, mouse, and monitor to the rendering/streaming computer and prepare to install Ubuntu: | Connect a keyboard, mouse, and monitor to the rendering/streaming computer and prepare to install Ubuntu: | ||
==Install ubuntu 22 | ==Install ubuntu 22 LTS== | ||
[https://ubuntu.com/download/desktop Download Ubuntu Desktop] and install | [https://ubuntu.com/download/desktop/thank-you?version=22.04.2&architecture=amd64 Download Ubuntu Desktop] and follow the instructions to install to a USB flash drive. | ||
* '''Notes''' To install, you will need to configure the system's BIOS to boot first from the USB flash drive. | * '''Notes''' To install, you will need to configure the system's BIOS to boot first from the USB flash drive. | ||
** Beelink: Repeatedly press 'delete' on the keyboard right after power up. | ** Beelink: Repeatedly press 'delete' on the keyboard right after power up. | ||
** HP: Repeatedly press F10 after power up | ** HP: Repeatedly press F10 after power up | ||
** Dell: Repeatedly press F2 after power up | ** Dell: Repeatedly press F2 after power up | ||
===OS configuration options=== | |||
* '''Important -''' Install Ubuntu with the following options | |||
** During installation, choose the option to download / install updates, including "third-party software for graphics, WiFi, and additional media formats" | |||
** Choose the option to erase the hard drive and perform a complete install. | |||
** Select Login Automatically | |||
** When prompted for your account's username, make sure you specify a password. This will allow you to easily switch between streaming mode and maintenance mode. | |||
[[image:ubunut_setup_options.jpg]] | |||
After the installation is complete, the computer will reboot into the standard desktop. | After the installation is complete, the computer will reboot into the standard desktop. | ||
| Line 126: | Line 174: | ||
* '''Notes''' | * '''Notes''' | ||
** The log-out/log-in step is important - don't skip it! | ** The log-out/log-in step is important - don't skip it! | ||
** | ** Disabling the keyring is important; it prevents a popup dialog when the RaceCapture app automatically starts. | ||
==Run the installer== | ==Run the installer== | ||
From the Ubuntu desktop, open a terminal and enter the following | From the Ubuntu desktop, open a terminal and enter the following commands, pressing <enter> after each line: | ||
<pre> | <pre> | ||
sudo apt install curl | |||
curl -sL bit.ly/3RL9Yoj | bash | |||
</pre> | </pre> | ||
| Line 163: | Line 212: | ||
==Plug in USB microphone== | ==Plug in USB microphone== | ||
* Plug USB microphone into a USB port | * Plug USB microphone into a USB port. | ||
Note: if using the Beelink, plug into one of the USB ports on the rear of the system. | |||
==Connect RaceCapture== | ==Connect RaceCapture== | ||
Your current RaceCapture system already supports multiple connections, so you can continue using your dashboard (e.g. Android tablet via Bluetooth) when adding this video+data streaming | Your current RaceCapture system already supports multiple connections, so you can continue using your dashboard (e.g. Android tablet via Bluetooth) when adding this video+data streaming capability. | ||
===Via USB (overall best option)=== | ===Via USB (overall best option)=== | ||
This is the best option for connecting RaceCapture to the streaming computer. Just connect a USB cable between the rendering/streaming system and RaceCapture. RaceCapture will automatically connect. | This is the best option for connecting RaceCapture to the streaming computer. Just connect a USB cable between the rendering/streaming system and RaceCapture. RaceCapture will automatically connect. | ||
| Line 203: | Line 252: | ||
To get back to the regular Ubuntu desktop, press ctrl-t, type :quit and press <enter>. | To get back to the regular Ubuntu desktop, press ctrl-t, type :quit and press <enter>. | ||
At the login screen, press the small gear icon in the lower right to select the Ubuntu desktop. | At the login screen, select your username and press the small gear icon in the lower right to select the Ubuntu desktop. | ||
To switch back to streaming mode, log out, press the small gear icon in the lower right and select the RaceCapture streaming option. Log in, and you will be streaming again. | To switch back to streaming mode, log out, press the small gear icon in the lower right and select the RaceCapture streaming option. Log in, and you will be streaming again. | ||
| Line 216: | Line 265: | ||
If using Youtube: Set the streaming key as provided by youtube. Or, you can specify a custom URL. | If using Youtube: Set the streaming key as provided by youtube. Or, you can specify a custom URL. | ||
==Local recording== | ==Local recording== | ||
If video_dir is set and points to a valid directory, local video recording will also be enabled. | |||
Videos for the current session are stored in a timestamped directory name under the configured video directory. Videos are saved as fixed-length segments to protect against file corruption due to sudden power loss, similar to how dashcams operate. | |||
If the system experiences sudden power loss, the video currently being written to will be corrupt and unreadable. Therefore, it is important to keep the video segment length reasonably short. | |||
After the session is complete, a full video can be made by using commonly available software to assemble all of the files. | |||
===video-config.ini=== | |||
<pre> | |||
[local_recording] | |||
video_dir=$HOME/Videos | |||
segment_length_sec=60 | |||
</pre> | |||
===Notes=== | |||
* Configure video_dir to the location where you want to save your video files. | |||
* Configure segment_length_sec for the desired segment length size. If not specified, the default is 60 seconds '''Note, keep this value reasonably short''' - sudden power loss will result in corruption in the last written file. | |||
==Microphone== | ==Microphone== | ||
If using a USB microphone (recommended) use the default audio_device=1 | If using a USB microphone (recommended) use the default audio_device=1 | ||
* Note, you can change this to different sources: | * Note, you can change this to different sources: | ||
** 0 = built-in | ** 0 = microphone connected to built-in headset port; | ||
** 1,2,3... | ** 1,2,3... = represents additional microphones found on the system, typically USB microphones. | ||
You can look under Ubuntu's system settings to discover available microphones and set their respective recording levels. | You can look under Ubuntu's system settings to discover available microphones and set their respective recording levels. | ||
| Line 237: | Line 304: | ||
streaming_url=rtmp://a.rtmp.youtube.com/live2/<streaming key> | streaming_url=rtmp://a.rtmp.youtube.com/live2/<streaming key> | ||
</pre> | </pre> | ||
==Video Bitrate== | |||
Specify the video bitrate, in kbps, in video-config.ini | |||
<pre> | |||
[streaming] | |||
streaming_url=rtmp://a.rtmp.youtube.com/live2/<streaming key> | |||
bitrate=2500 | |||
</pre> | |||
=First Test= | |||
Once your streaming key has been set and saved, log out and log back into the streamer by selecting the RaceCapture streaming mode on the login page using the gear icon in the lower right. | |||
Check your youtube livestream to see if you are receiving video. If not, try restarting the system and let the streamer launch cleanly after a fresh reboot. | |||
=Maintenance/Troubleshooting= | =Maintenance/Troubleshooting= | ||
==Open a terminal window== | ==Open a terminal window== | ||
(advanced mode) You can open a terminal window while RaceCapture is streaming by entering the following command. | |||
* Press ctrl+t then c | * Press ctrl+t, then type c, then press <enter> | ||
The screen will split into two equal windows; the new window will be a terminal where you can perform debugging steps, such as viewing log files, etc. | |||
* '''Note''': The more user-friendly alternative is to just log out and log back in to the Ubuntu desktop. | |||
==Log out== | ==Log out== | ||
You can log out of the current session to access the original Ubuntu desktop to perform additional maintenance. | You can log out of the current session to access the original Ubuntu desktop to perform additional maintenance. | ||
* Press | * Press ctrl-t, then type :quit, then press <enter> | ||
Once you've logged out, you can log back into the Ubuntu desktop by pressing the gear icon in the lower right, and select Ubuntu. | Once you've logged out, you can log back into the Ubuntu desktop by pressing the gear icon in the lower right, and select Ubuntu. | ||
To get back to the RaceCapture full-screen app mode, select "RaceCapture livestreaming" from this menu; this is the window manager that is configured to run RaceCapture in full-screen mode. | To get back to the RaceCapture full-screen app mode, select "RaceCapture livestreaming" from this menu; this is the window manager that is configured to run RaceCapture in full-screen mode. | ||
==Inspecting Logfiles== | |||
Log files are located in the logs directory under the user's home directory. Log files are named with the date they were created. | |||
===Video streamer log file=== | |||
The log files for the video streamer agent have information about the video streamer's connection and activity. You can open it to see any helpful error messages regarding streaming. | |||
===RaceCapture log file=== | |||
The RaceCapture log file will have potentially useful information for debugging the operation of the RaceCapture app. | |||
=Extras= | |||
==Mount for Beelink micro PC== | |||
We have designed a cage-style mount for the Beelink Micro PC. This allows convenient surface mounting of the PC. | |||
* Download STL file for 3D printing: [[file:Beelink_SER5_mount.zip]] | |||
[[image:beelink_cage_mount.jpg]] | |||
Revision as of 02:46, 9 December 2023
Introduction
This guide shows you how to add video+data livestreaming to your existing RaceCapture system.
After following this guide, you will have:
- 2-camera video with picture-in-picture
- Rich, realtime graphics overlay
- Broadcast to youtube or your preferred streaming provider via an in-vehicle cellular hotspot
- Local video recording
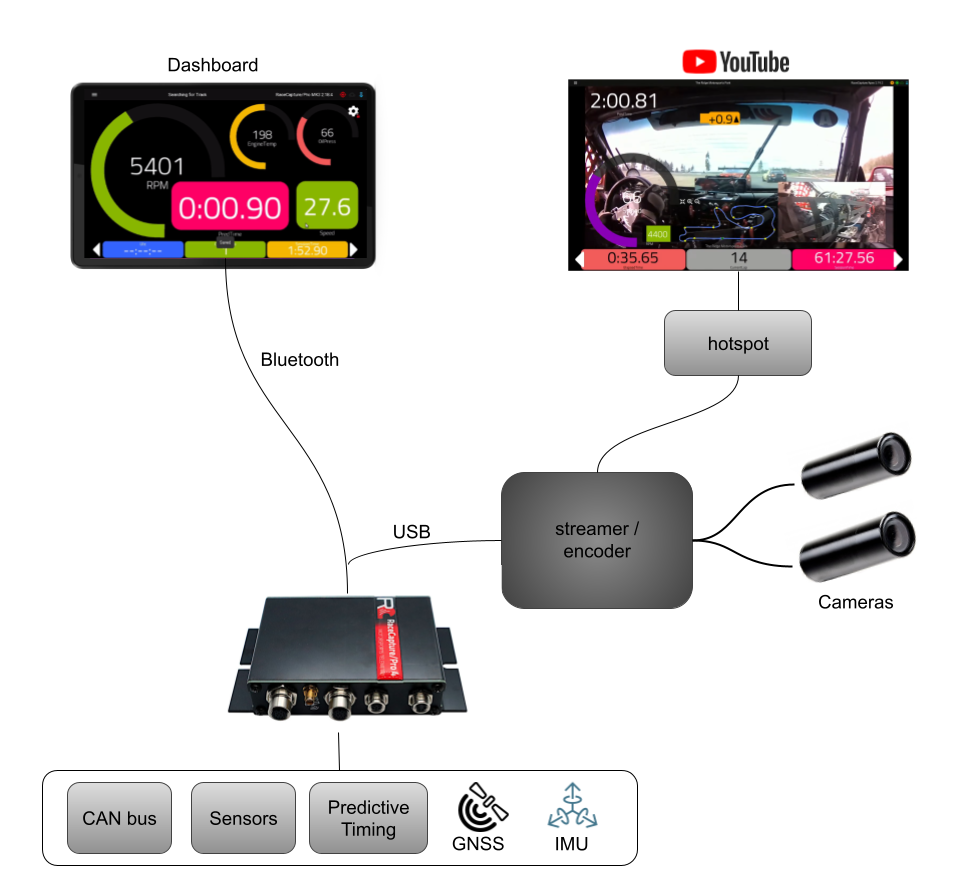
System Overview
Video+data streaming is enabled by using a separate streaming/encoding device. As RaceCapture supports multiple simultaneous connections, an existing dashboard can be retained.
Cost
The cost for adding video+data livestreaming to your RaceCapture system can range between 0 and 800 USD, depending on the parts you may already have on hand.
How hard is it to setup?
This project requires following instructions, including:
- Installing an operating system
- Typing computer commands
- Plugging in cables
- Editing configuration files
- Selecting options in an application
This ability is within the realm of someone with moderate computer skills. If the instructions seem daunting, find someone to help you along.
- For those who crave convenience, we will also be offering a pre-packaged setup that take care of most of the setup steps.
Production State
Since it is based on existing RaceCapture technology (RaceCapture hardware and RaceCapture app), the core of the system is very stable.
New components that add video rendering, encoding, and streaming will be improved through your testing feedback and rounds of updates.
As of this writing, several existing RaceCapture users have put the system through it's paces with great results.
So far we were very pleased with the stability and performance, and we will continue to improve the system through software updates.
A demonstration
Here's the Session from the inaugural test (with sub optimal camera exposure settings and low quality microphone)
Provided ID could not be validated.
Experimental
While we consider this experimental - it is also a free software upgrade for a system that was never originally designed for this purpose.
With your testing help we can steadily improve it and ultimately provide an incredibly cost effective yet very full-featured and high performance system that rivals solutions costing upwards of $5000 USD.
Parts you will need
Your existing RaceCapture system
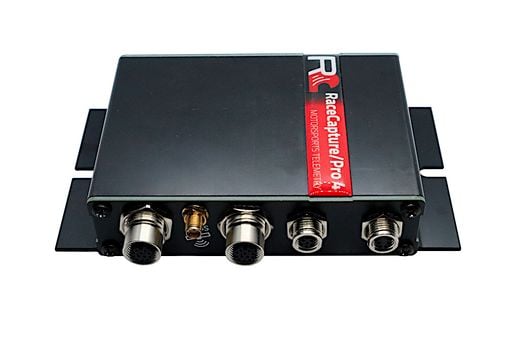
The RaceCapture system will provide access to your car's sensor data (CAN bus or analog sensors), high performance GPS, Accelerometer / Gyro sensors, lap timing and other motorsport related statistics.
Compatible Systems
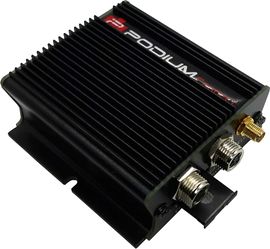
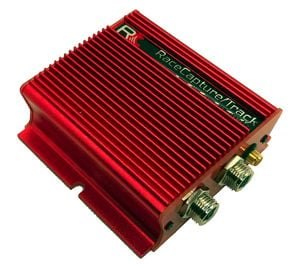
- Any current or previous RaceCapture or PodiumConnect system will work.
Rendering/Streaming computer
A tiny form-factor computer is used to receive data from RaceCapture and is responsible for video+data overlay, encoding, and broadcasting the video to youtube or similar streaming platform.
Recommended
The Beelink SER5 is our recommended choice as it is powerful, cost effective, and provided in a compact and lightweight form factor.
Alternatives
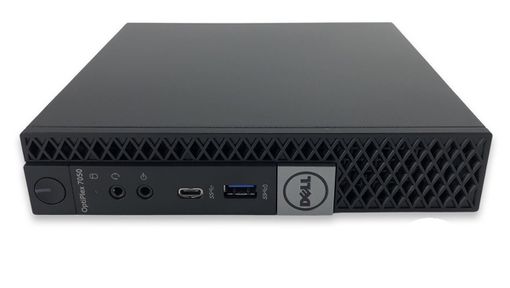
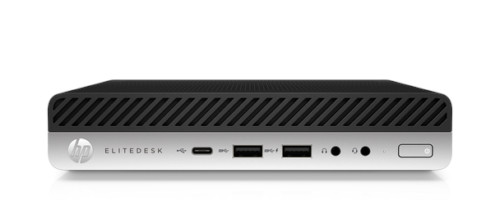
A micro system with an Intel I5-6500 through I5-7600 + SSD + 8GB RAM is an acceptable option as well. This may be a system you already have or a surplus system you can get at minimum cost.
- Look for these options:
- SSD (required for ruggedness - smallest size is fine).
- Smallest RAM option is fine (typically 8GB)
- Included WiFi - for connection versatility
Candidates
- Dell Optiplex 7050 micro desktop: Ebay search (nice because most have wifi)
- HP EliteDesk 800 G3 Mini: Ebay search
12v DC to DC converter
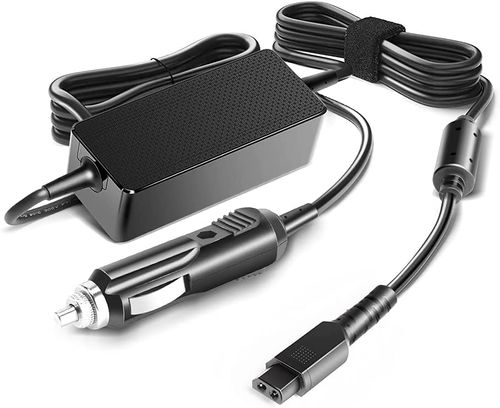
A 12v-19v DC to DC converter is needed to power the rendering/broadcasting computer in the vehicle. This converter avoids needing an AC inverter in the car, making for a clean installation.
- Tips:
- Choose a device that has sufficient power capacity (100W minimum)
Recommended
These have been tested to work:
- Tips:
- We recommend cutting the cigar lighter connection and hard-wiring the power to a 15A circuit. (center conductor is positive).
Cameras
You will need 1 or 2 cameras for capturing and rendering video.
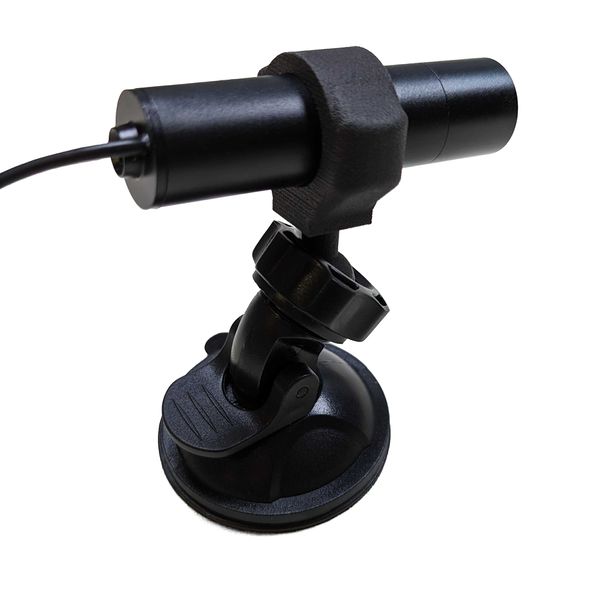
Recommended Camera Kit
Autosport Labs will soon provide a camera kit that provides high quality imaging, a compact and ruggedized IP65 form-factor, and the perfect 110 degree field of view.
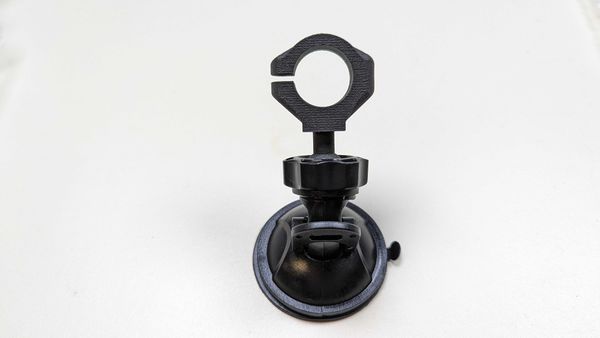
Assembling the Camera Kit
Using the supplied hardware, insert the nut into the camera clamp using a pair of small pliers. Then, use the included screw to clamp the camera to the mount.
Then, assemble the camera clamp into ball and socket windshield mount, or the GoPro mount. (1 of each style is included in the kit)
Ball and Socket windshield mount
GoPro style mount
Alternatives
Most any USB camera (such as a webcam) can be used. These are commonly found on Amazon or Ebay.
- Tips:
- Logitech is a good, high quality option
- Find a camera that offers a 1/4-20 threaded camera mount for a secure rollbar attachment to minimize vibration.
Microphone
A microphone is needed for capturing audio.
- Candidates:
- USB microphone - you can use a separate USB microphone, especially if you get one that offers higher quality.
- Analog microphone - you can use an analog microphone that attaches to the front headset input of the micro PC. Make sure you get a microphone that has the 4-ring connector for proper operation.
- Microphone embedded in one of the cameras - if one of your your cameras has its own microphone, you can use that as an audio source.
Using the Microphone included with the kit
The kit provides a USB microphone with good audio quality.
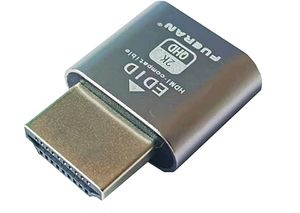
Display Emulator
You'll need a display emulator to plug into the streamer while running on track. This tricks the computer into thinking a monitor is attached, allowing the streamer to run.
The following have been tested:
- HDMI emulator - use this for the Beelink Micro PC
- DisplayPort emulator - use this for the HP or Dell Micro PCs
Hotspot/Router
Most any hostspot should work, but for the best performance and reliability, these options should be considered:
- Hard-wired ethernet connection, for direct connection to the micro computer.
- External antenna connection - a hotspot that offers external antenna will boost performance by allowing you to use a high-gain roof-mount antenna.
Suggested units that offer direct hardwired connection:
Setup
Connect a keyboard, mouse, and monitor to the rendering/streaming computer and prepare to install Ubuntu:
Install ubuntu 22 LTS
Download Ubuntu Desktop and follow the instructions to install to a USB flash drive.
- Notes To install, you will need to configure the system's BIOS to boot first from the USB flash drive.
- Beelink: Repeatedly press 'delete' on the keyboard right after power up.
- HP: Repeatedly press F10 after power up
- Dell: Repeatedly press F2 after power up
OS configuration options
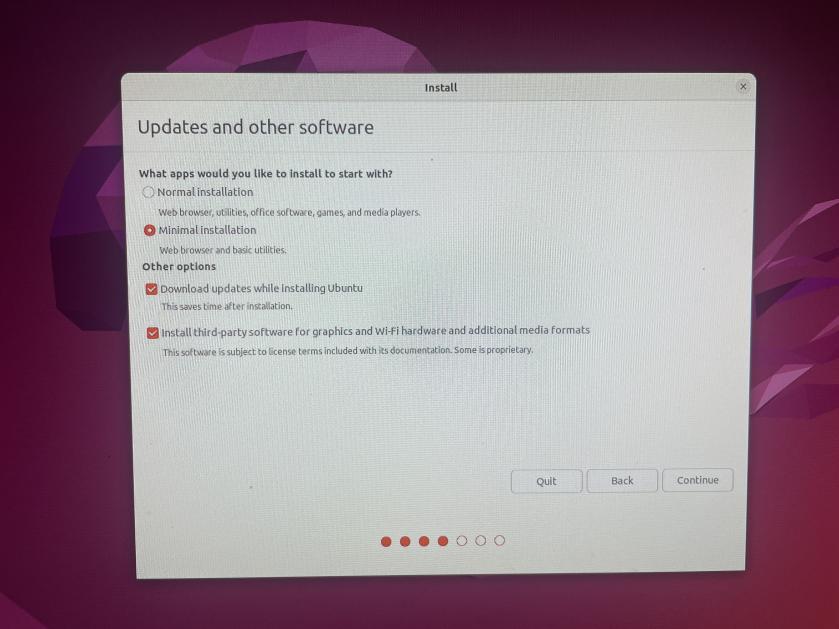
- Important - Install Ubuntu with the following options
- During installation, choose the option to download / install updates, including "third-party software for graphics, WiFi, and additional media formats"
- Choose the option to erase the hard drive and perform a complete install.
- Select Login Automatically
- When prompted for your account's username, make sure you specify a password. This will allow you to easily switch between streaming mode and maintenance mode.
After the installation is complete, the computer will reboot into the standard desktop.
Disable keyring popup
From the desktop: log out, and log back in using with the password you created during the installation step.
Then, Disable the keyring popup using these instructions. Observe the security notes in this guide.
- Notes
- The log-out/log-in step is important - don't skip it!
- Disabling the keyring is important; it prevents a popup dialog when the RaceCapture app automatically starts.
Run the installer
From the Ubuntu desktop, open a terminal and enter the following commands, pressing <enter> after each line:
sudo apt install curl
curl -sL bit.ly/3RL9Yoj | bash
This will automatically install the RaceCapture app and video streamer, related software dependencies, and set up configuration file templates.
Reboot
Reboot the computer once it is complete with the installation. It should automatically launch the RaceCapture app.
Edit RaceCapture settings
Edit these RaceCapture settings for proper operation when streaming
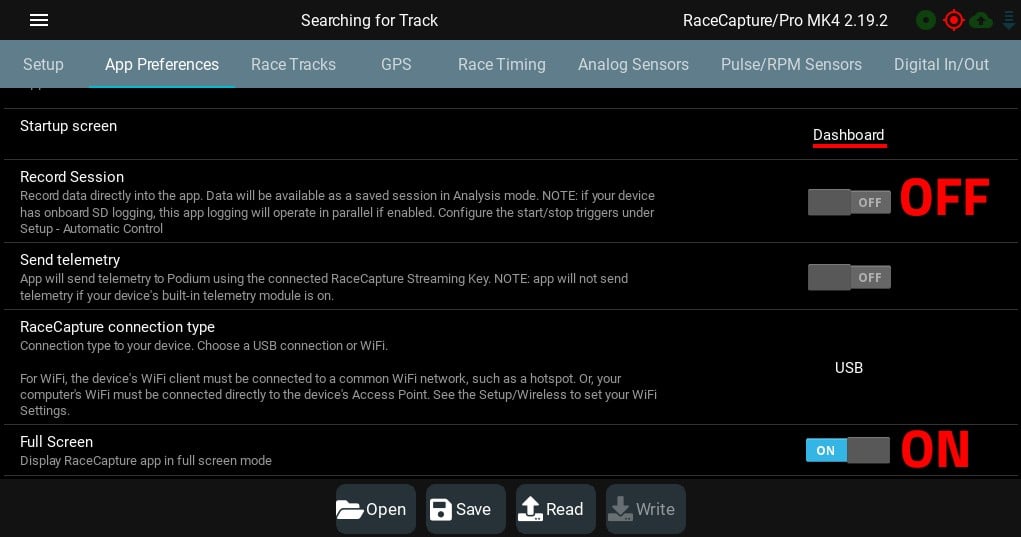
App Preferences
Navigate to Setup / App Preferences:
- set Fullscreen -> ON
- Set Startup Screen -> Dashboard
- Turn off Session Recording
Dashboard Preferences
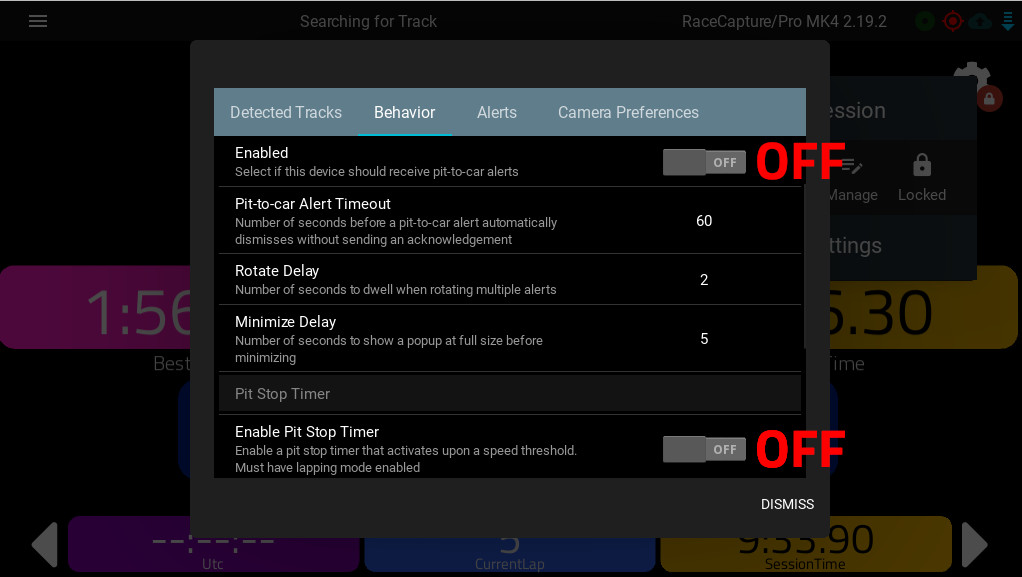
Navigate to the Dashboard, then press the gear icon in the upper right of the dashboard, select "More Settings" and set the following:
- Turn off Pit stop timer
- Turn off pit-to-car alerts
- Turn off remote dashboard navigation (scroll to bottom)
Plug in camera(s)
Plug in 1 or 2 cameras into the USB port
- Note: Remember the ports the cameras are plugged into, and keep this consistent during use.
Plug in USB microphone
- Plug USB microphone into a USB port.
Note: if using the Beelink, plug into one of the USB ports on the rear of the system.
Connect RaceCapture
Your current RaceCapture system already supports multiple connections, so you can continue using your dashboard (e.g. Android tablet via Bluetooth) when adding this video+data streaming capability.
Via USB (overall best option)
This is the best option for connecting RaceCapture to the streaming computer. Just connect a USB cable between the rendering/streaming system and RaceCapture. RaceCapture will automatically connect.
Via WiFi
If you're already using the USB connection for a Raspberry Pi dash, you can configure the rendering/streaming system to connect to RaceCapture via WiFi.
Configure as Client
If you are already using WiFi to connect the rendering/streaming system to your hotspot, you will need to configure RaceCapture to connect to the same hotspot via the WiFi client settings. In this configuration, everything shares the same network created by the hotspot.
- Note: Due to system limitations, your hotspot must be up and running before RaceCapture attempts to connect to it via WiFi.
Access Point connection (best WiFi option)
If you are connecting the rendering/streaming system to the hotspot via ethernet, then you can connect the rendering/streaming system directly to RaceCapture's WiFi Access Point. The system will receive data from RaceCapture via WiFi, and broadcast the video+data stream to the hotspot via ethernet.
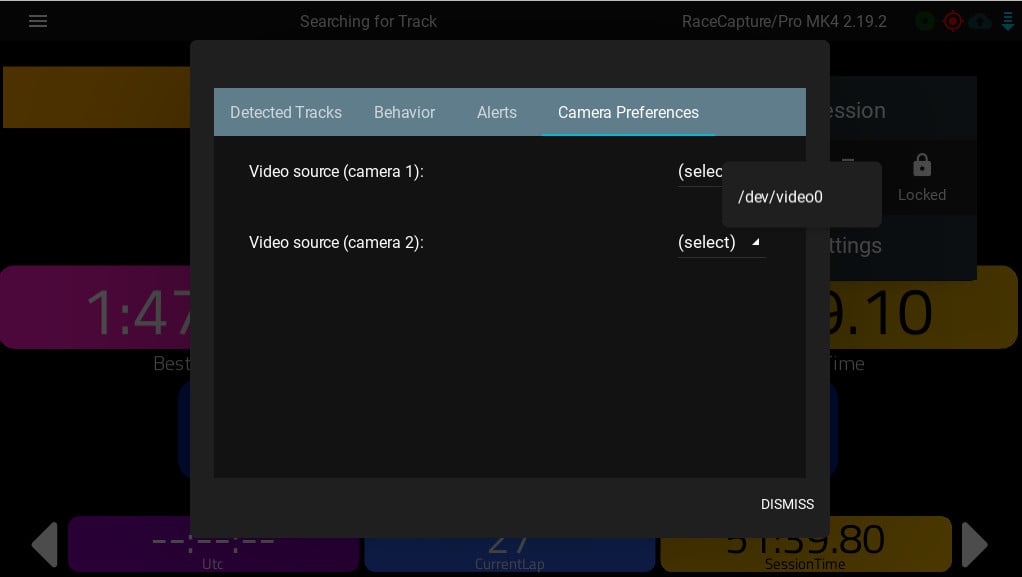
Configure dashboard video options
- Press Settings Gear Icon, go to More Settings / Camera Preferences
Select /dev/video0 for Camera #1, and /dev/video2 for Camera #2
Create a test dashboard
- Press the Settings gear icon, select Add Gauge
- create a video gauge, and select Camera 1 as the source.
- Resize to fit the dashboard.
- create another video gauge, and select Camera 2 as the source.
- Resize to be the picture-in-picture video window.
- Add additional gauges as you see fit, such as an analog speed gauge, track map, etc.
- Note If the cameras are reversed, you can swap the camera mappings in the main dashboard settings under More Settings / Camera Preferences
Editing the dashboard is very easy - see this demo for an example:
Exiting the RaceCapture app
To get back to the regular Ubuntu desktop, press ctrl-t, type :quit and press <enter>.
At the login screen, select your username and press the small gear icon in the lower right to select the Ubuntu desktop.
To switch back to streaming mode, log out, press the small gear icon in the lower right and select the RaceCapture streaming option. Log in, and you will be streaming again.
- Note: The system will persist the last option you pick - so if you reboot or power cycle, it will automatically enter streaming mode.
Video Streaming / recording
To configure your streaming settings, switch back to the regular Ubuntu Desktop.
Then, edit the video-config.ini - you'll find the file on the desktop. Edit this with the standard text editor by double-clicking it.
Streaming Key / URL
If using Youtube: Set the streaming key as provided by youtube. Or, you can specify a custom URL.
Local recording
If video_dir is set and points to a valid directory, local video recording will also be enabled.
Videos for the current session are stored in a timestamped directory name under the configured video directory. Videos are saved as fixed-length segments to protect against file corruption due to sudden power loss, similar to how dashcams operate.
If the system experiences sudden power loss, the video currently being written to will be corrupt and unreadable. Therefore, it is important to keep the video segment length reasonably short.
After the session is complete, a full video can be made by using commonly available software to assemble all of the files.
video-config.ini
[local_recording]
video_dir=$HOME/Videos
segment_length_sec=60
Notes
- Configure video_dir to the location where you want to save your video files.
- Configure segment_length_sec for the desired segment length size. If not specified, the default is 60 seconds Note, keep this value reasonably short - sudden power loss will result in corruption in the last written file.
Microphone
If using a USB microphone (recommended) use the default audio_device=1
- Note, you can change this to different sources:
- 0 = microphone connected to built-in headset port;
- 1,2,3... = represents additional microphones found on the system, typically USB microphones.
You can look under Ubuntu's system settings to discover available microphones and set their respective recording levels.
Example default config file
[capture]
audio_device=1

[local_recording]
video_dir=$HOME/Videos

[streaming]
streaming_url=rtmp://a.rtmp.youtube.com/live2/<streaming key>
Video Bitrate
Specify the video bitrate, in kbps, in video-config.ini
[streaming]
streaming_url=rtmp://a.rtmp.youtube.com/live2/<streaming key>
bitrate=2500
First Test
Once your streaming key has been set and saved, log out and log back into the streamer by selecting the RaceCapture streaming mode on the login page using the gear icon in the lower right.
Check your youtube livestream to see if you are receiving video. If not, try restarting the system and let the streamer launch cleanly after a fresh reboot.
Maintenance/Troubleshooting
Open a terminal window
(advanced mode) You can open a terminal window while RaceCapture is streaming by entering the following command.
- Press ctrl+t, then type c, then press <enter>
The screen will split into two equal windows; the new window will be a terminal where you can perform debugging steps, such as viewing log files, etc.
- Note: The more user-friendly alternative is to just log out and log back in to the Ubuntu desktop.
Log out
You can log out of the current session to access the original Ubuntu desktop to perform additional maintenance.
- Press ctrl-t, then type :quit, then press <enter>
Once you've logged out, you can log back into the Ubuntu desktop by pressing the gear icon in the lower right, and select Ubuntu.
To get back to the RaceCapture full-screen app mode, select "RaceCapture livestreaming" from this menu; this is the window manager that is configured to run RaceCapture in full-screen mode.
Inspecting Logfiles
Log files are located in the logs directory under the user's home directory. Log files are named with the date they were created.
Video streamer log file
The log files for the video streamer agent have information about the video streamer's connection and activity. You can open it to see any helpful error messages regarding streaming.
RaceCapture log file
The RaceCapture log file will have potentially useful information for debugging the operation of the RaceCapture app.
Extras
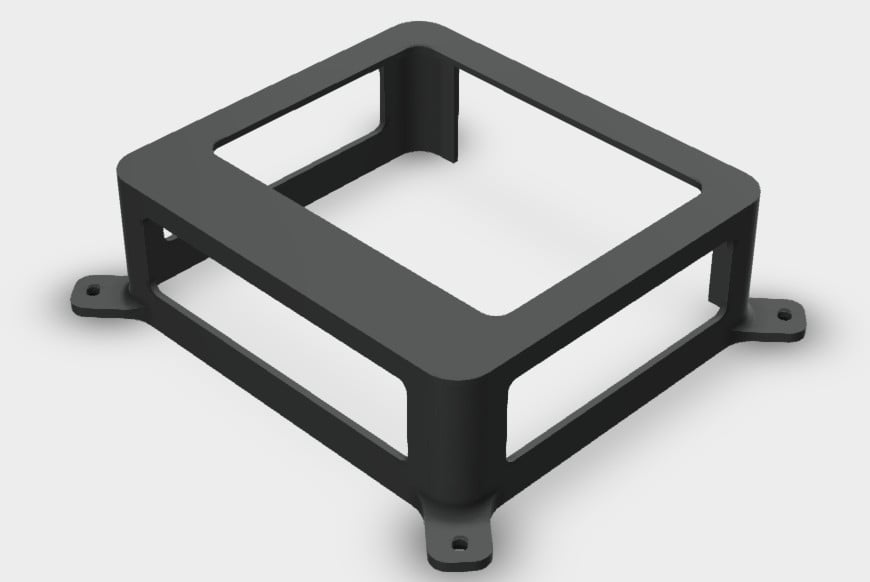
Mount for Beelink micro PC
We have designed a cage-style mount for the Beelink Micro PC. This allows convenient surface mounting of the PC.
- Download STL file for 3D printing: File:Beelink SER5 mount.zip

