RaceCapturePro Calibrate Sensor: Difference between revisions
No edit summary |
m (Brentp moved page RaceCapturePro2 Calibrate Sensor to RaceCapturePro Calibrate Sensor) |
||
| (One intermediate revision by the same user not shown) | |||
| Line 29: | Line 29: | ||
For mapped calibration 5 Bins are provided to map a 0-5v value to a real world value. For each Bin specify the voltage and the corresponding scaled value. | For mapped calibration 5 Bins are provided to map a 0-5v value to a real world value. For each Bin specify the voltage and the corresponding scaled value. | ||
'''Note''' Linear interpolation is used to scale values between points. | '''Note''': Linear interpolation is used to scale values between points. | ||
[[Image:AnalogConfiguredMapped.png|500px]] | [[Image:AnalogConfiguredMapped.png|500px]] | ||
| Line 43: | Line 43: | ||
Scaled: 0 150 150 150 150 | Scaled: 0 150 150 150 150 | ||
Note | '''Note:''' if only two points are needed in the map, simply repeat the last Bin until the end of the table. | ||
* Once you are done, click the Apply Config button in the bottom left | * Once you are done, click the Apply Config button in the bottom left | ||
Latest revision as of 05:39, 25 March 2017
How to Calibrate and Configure an Analog Sensor
Requirements
- RaceCapture/Pro
- Analog sensor (temperature, pressure, etc)
- Multimeter
Instructions
Setup
In order for RaceCapture/Pro to log an analog sensor's value, it must understand what voltages correspond to what values. Example: for a temperature sensor 2 volts may mean 150 degrees fahrenheit. The easiest method of discovering this is to hook up a gauge to the sensor while it is installed and record the voltage values via a multimeter. Or you can purchase a sensor that has a known voltage/value map here: RaceCapture/Pro Sensors. You will need the full range of voltage and values you want to log (example: for a coolant temperature sensor you would want a range from 50F to 275F, you must have the voltages for 50F and 275F).
Configuring RaceCapture/Pro
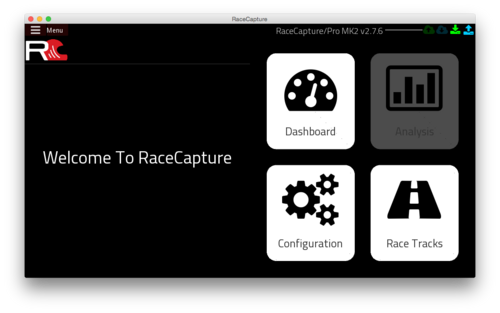
- Plug in RaceCapture/Pro to your computer and open the Race Capture app.
- Wait for RaceCapture/Pro to be detected and the configuration read from it

- Click on 'Configuration'
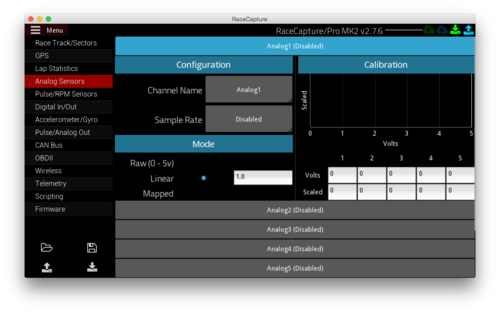
- Click on 'Analog Sensors' in the left column
- Click on the analog input you connected your sensor to in the list of analog inputs

- Select the Channel Name and Sample Rate. Suggested rates:
- Temperature Sensors: 1 - 5Hz
- Pressure Sensors: 10 - 25Hz
- Channel Modes:
- Raw: The raw 0 - 5v voltage is logged.
- Linear: A simple multiplier is applied to the raw voltage.
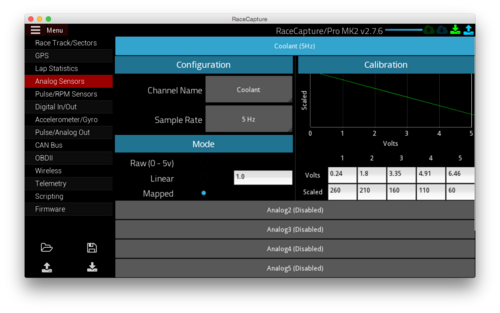
- Mapped: Map the raw voltage to a scaled value. Ideal for non-linear sensors.
For mapped calibration 5 Bins are provided to map a 0-5v value to a real world value. For each Bin specify the voltage and the corresponding scaled value.
Note: Linear interpolation is used to scale values between points.
Example- Calibrating a 0-150 PSI pressure sensor
The pressure sensor outputs a voltage corresponding to pressure:
- 0.5v = 0 PSI
- 4.5v = 150 PSI
To map this sensor, enter the following values into the mapping table:
Volts:  0.5  4.5  4.5  4.5  4.5
Scaled: 0    150  150  150  150
Note: if only two points are needed in the map, simply repeat the last Bin until the end of the table.
- Once you are done, click the Apply Config button in the bottom left
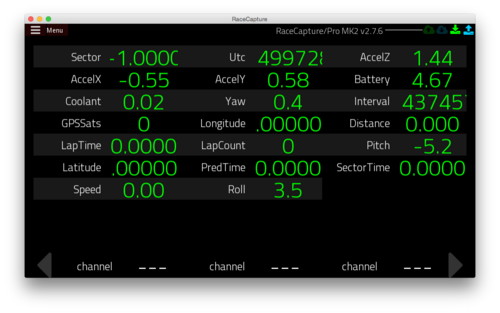
An easy way to figure out if you've calibrated your sensors correctly is to use the digital dash view under 'Dashboard' in the Race Capture app. There you can view all channels being logged in realtime from RaceCapture/Pro.


