RaceCapturePro2 3.5G module upgrade: Difference between revisions
(Created page with "=3.5G Module Upgrade= ==Summary== This guide will show you how to upgradethe 3.5G cellular module into an existing RaceCapture/Pro MK2. ===Compatibility Notes=== * This 3.5...") |
No edit summary |
||
| Line 1: | Line 1: | ||
=3.5G Module Upgrade= | =3.5G Module Upgrade= | ||
== | ==Overview== | ||
The 3.5G module employs the U-blox SARA-U280 GSM module and is compatible with GSM carriers in North America such as AT&T, T-Mobile and MVMO carriers employing these networks. | |||
This guide | The form factor of the 3.5G module is identical to the 2.5G module, allowing any RaceCapture/Pro MK2 system to be upgraded. This guide steps you through the process to upgrade RaceCapture/Pro MK2 to the 3.5G cellular module. | ||
==Module Identification== | |||
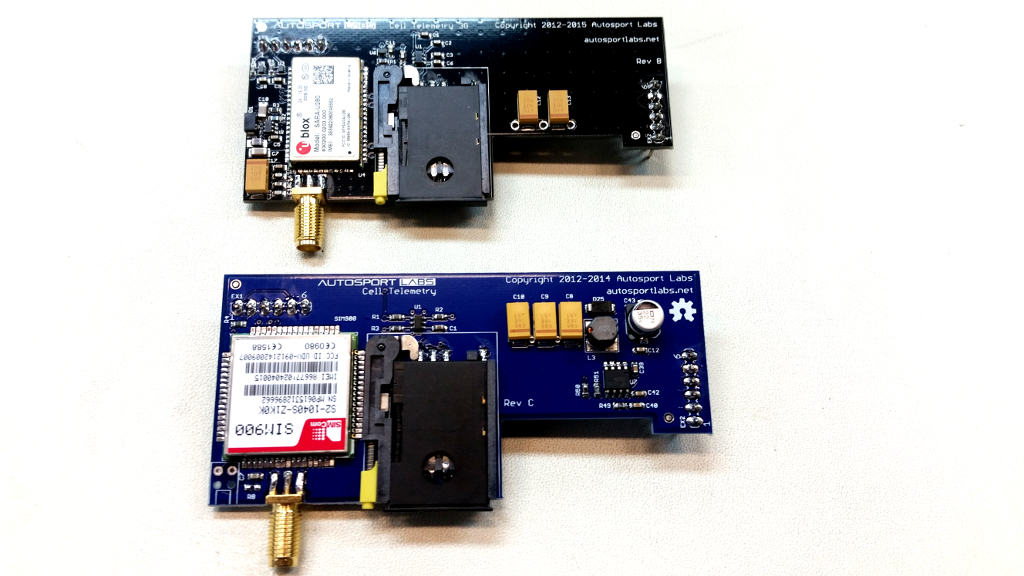
* Top: The 3.5G module, identified by the U-Blox logo. | |||
* Bottom: The 2.5G module, identified by the SIM900 designation. | |||
[[Image:RaceCapture_MK2_3.5G_vs_2.5G.jpg]] | |||
==Identification in Firmware== | |||
To identify a 3.5G vs 2.5G module, power-cycle RaceCapture/Pro and observe the logfile output. Look for cellular initialization messages | |||
* 2.5G: Cellular initialization messages begin with [SIM900] | |||
* 3.5G: Cellular initialization messages begin with [ublox] | |||
===Compatibility Notes=== | ===Compatibility Notes=== | ||
| Line 9: | Line 20: | ||
* Currently, the 3.5G module is intended for North America Markets only (United States, Canada, Mexico) | * Currently, the 3.5G module is intended for North America Markets only (United States, Canada, Mexico) | ||
* The existing 2.5G module will remain available for worldwide operation. | * The existing 2.5G module will remain available for worldwide operation. | ||
===Installation=== | ===Installation=== | ||
| Line 23: | Line 29: | ||
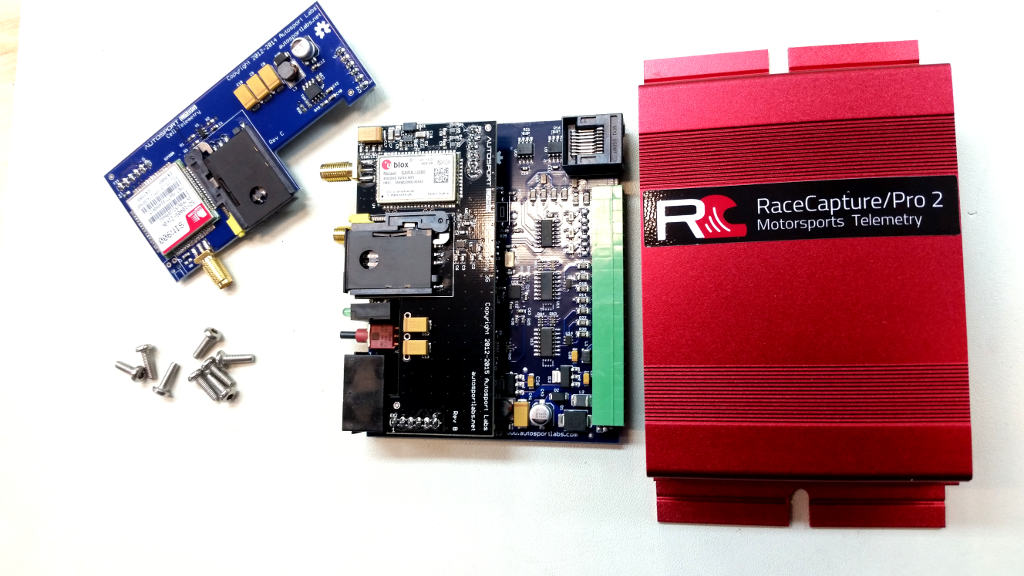
* Remove the board assembly from the enclosure. | * Remove the board assembly from the enclosure. | ||
** You will need to pop the green terminal block free from the opposite end plate as it is a tight fit, by design. | ** You will need to pop the green terminal block free from the opposite end plate as it is a tight fit, by design. | ||
[[Image:RaceCapture_MK2_3.5G_2.5G_module_swap.jpg]] | |||
==== | ====Install 3.5G module==== | ||
* Remove the SIM card if necessary. | * Remove the SIM card if necessary. | ||
* Gently pry the module away from the base board one side at a time until it is free from the socket on either side of the board. | * Gently pry the module away from the base board one side at a time until it is free from the socket on either side of the board. | ||
| Line 31: | Line 38: | ||
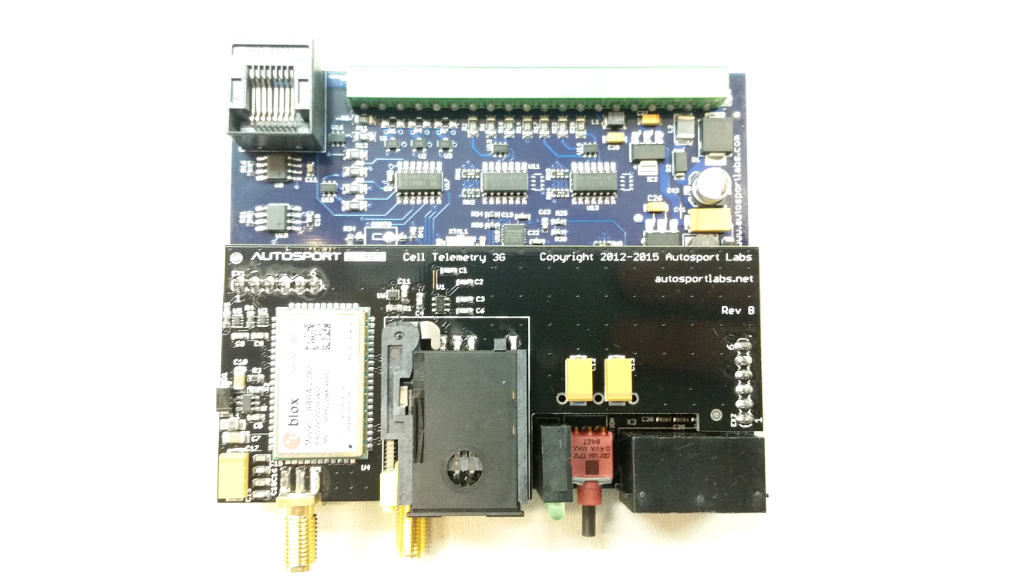
** Ensure the pins are plugged in on both sides | ** Ensure the pins are plugged in on both sides | ||
** Ensure both sides are plugged in evenly, with no overhanging pins | ** Ensure both sides are plugged in evenly, with no overhanging pins | ||
** When installed, front edge of telemetry module board should be exactly parallel to main board of RaceCapture/Pro | ** When installed, front edge of telemetry module board should be exactly parallel to main board of RaceCapture/Pro. | ||
[[Image:RaceCapture_MK2_3.5G_installed_on_board.jpg]] | |||
====Re-installation==== | ====Re-installation==== | ||
| Line 38: | Line 46: | ||
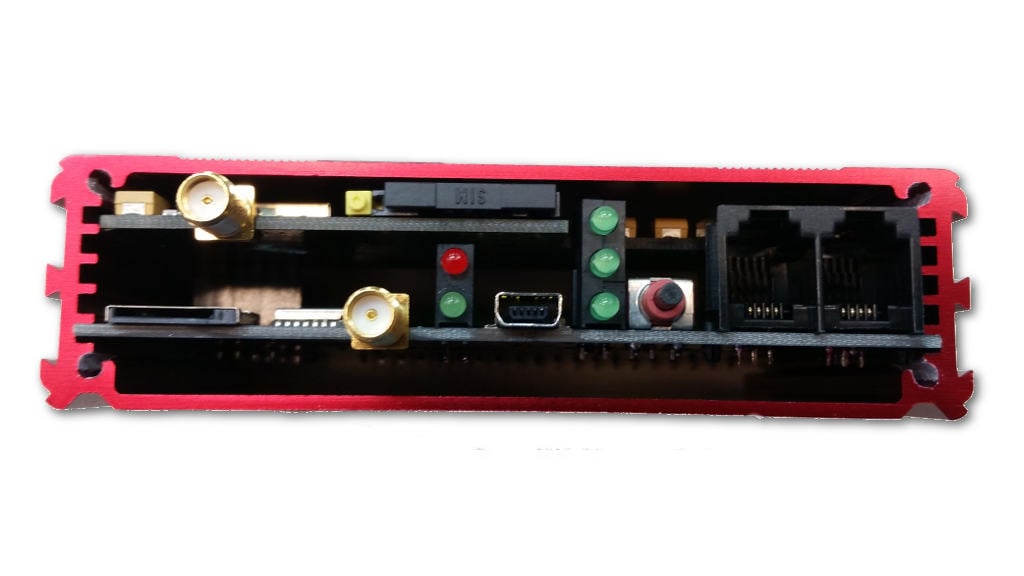
* Once the board is installed, re-install the end plate | * Once the board is installed, re-install the end plate | ||
** Ensure the flanges are re-installed, if necessary | ** Ensure the flanges are re-installed, if necessary | ||
* Using the new screws provided, carefully hand thread the screws until you | * Using the new screws provided, carefully hand thread the screws until you engage the existing threads, then carefully screw in the rest of the way using a hand tool. | ||
** '''It's important to avoid cross-threading the screws as the aluminum is delicate''' | ** '''It's important to avoid cross-threading the screws as the aluminum is delicate''' | ||
* Re-install the SMA washers and nuts. Torque the nuts to 3-5 inch/pounds | * Re-install the SMA washers and nuts. Torque the nuts to 3-5 inch/pounds | ||
** '''Do not overtighten nuts''' | ** '''Do not overtighten nuts''' | ||
[[Image:RaceCapture_MK2_3.5G_install_end.jpg]] | |||
===Firmware support=== | |||
The 3G module requires 2.9.x firmware or later. [[Upgrade the firmware using the normal process|RaceCapturePro_Downloads#Firmware]] | |||
* '''Ensure your configuration is backed up before upgrading firmware''' | |||
===Testing=== | |||
* Re-insert your SIM card and follow the [[RaceCapturePro2_TelemetryQuickstart|testing procedure]] in our telemetry quick start guide. | |||
** '''Note:''' the 3.5G module does not require constant 12v for operation, it can be tested via USB power alone. | |||
===Re-installation into car=== | |||
* Re-connect connectors, antennas, and terminal block and install as before. | |||
Revision as of 19:22, 6 April 2016
3.5G Module Upgrade
Overview
The 3.5G module employs the U-blox SARA-U280 GSM module and is compatible with GSM carriers in North America such as AT&T, T-Mobile and MVMO carriers employing these networks.
The form factor of the 3.5G module is identical to the 2.5G module, allowing any RaceCapture/Pro MK2 system to be upgraded. This guide steps you through the process to upgrade RaceCapture/Pro MK2 to the 3.5G cellular module.
Module Identification
- Top: The 3.5G module, identified by the U-Blox logo.
- Bottom: The 2.5G module, identified by the SIM900 designation.
Identification in Firmware
To identify a 3.5G vs 2.5G module, power-cycle RaceCapture/Pro and observe the logfile output. Look for cellular initialization messages
- 2.5G: Cellular initialization messages begin with [SIM900]
- 3.5G: Cellular initialization messages begin with [ublox]
Compatibility Notes
- This 3.5G module is compatible with RaceCapture/Pro MK2 only.
- Currently, the 3.5G module is intended for North America Markets only (United States, Canada, Mexico)
- The existing 2.5G module will remain available for worldwide operation.
Installation
Disassembling RaceCapture/Pro
- Using a torx T1 bit, carefully remove the screws from the LED end of RaceCapture/Pro.
- Do this slowly with a hand tool to prevent stripping of threads
- Unscrew and remove the gold SMA antenna nuts and washers from the GPS and cellular antenna connections.
- Remove the end plate
- Remove the board assembly from the enclosure.
- You will need to pop the green terminal block free from the opposite end plate as it is a tight fit, by design.
Install 3.5G module
- Remove the SIM card if necessary.
- Gently pry the module away from the base board one side at a time until it is free from the socket on either side of the board.
- Remove the new 3.5G module from the pouch and stow the 2.5G module into this pouch. Set the 2.5G module aside.
- Install the the 3G module onto the same sockets of the RaceCapture/Pro board
- Ensure the pins are plugged in on both sides
- Ensure both sides are plugged in evenly, with no overhanging pins
- When installed, front edge of telemetry module board should be exactly parallel to main board of RaceCapture/Pro.
Re-installation
- Slide the assembly back into the enclosure, sliding the board into the bottom rail slot
- When the board reaches the opposite end, you may need to use a tool to press down onto the green terminal block to ease it back into the machined cut-out.
- Once the board is installed, re-install the end plate
- Ensure the flanges are re-installed, if necessary
- Using the new screws provided, carefully hand thread the screws until you engage the existing threads, then carefully screw in the rest of the way using a hand tool.
- It's important to avoid cross-threading the screws as the aluminum is delicate
- Re-install the SMA washers and nuts. Torque the nuts to 3-5 inch/pounds
- Do not overtighten nuts
Firmware support
The 3G module requires 2.9.x firmware or later. RaceCapturePro_Downloads#Firmware
- Ensure your configuration is backed up before upgrading firmware
Testing
- Re-insert your SIM card and follow the testing procedure in our telemetry quick start guide.
- Note: the 3.5G module does not require constant 12v for operation, it can be tested via USB power alone.
Re-installation into car
- Re-connect connectors, antennas, and terminal block and install as before.


