MJLJ V4 kit assembly guide: Difference between revisions
(→Through Hole Parts: grammar) |
(→Testing Voltages: added voltage testing section) |
||
| Line 172: | Line 172: | ||
====Testing Voltages==== | ====Testing Voltages==== | ||
Test voltages at the following locations: | |||
Apply power to | *'''Power supply components:''' | ||
Apply power to the Molex pads shown in the image using a low current, 9 - 12v power supply source. A 9V battery is ideal for testing. | |||
*U1 | Verify +5v at the test point. if the test point is covered with green solder mask, you can test on the adjacent pads on D1 or R9. | ||
*U2 | [[Image:mjlj_v4_power_supply_vcheck.jpg]] | ||
<br><br> | |||
*QG1 | *'''U1:''' Verify +5v across the Vdd, Vss pins of U1 | ||
*PS1 | *'''IC1:''' Verify approximately +V-Supply (about .6 volts lower than +V-Supply) across the IC1 CD+ and Gnd pins | ||
[[Image:mjlj_v4_U1_IC1_vcheck.jpg]] | |||
<br><br> | |||
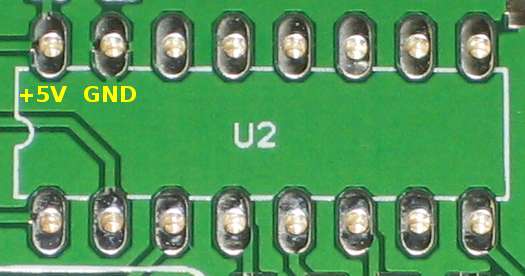
*'''U2:''' Verify +5v across Vcc and GND pins of U2 | |||
[[Image:mjlj_v4_U2_vcheck.jpg]] | |||
<br><br> | |||
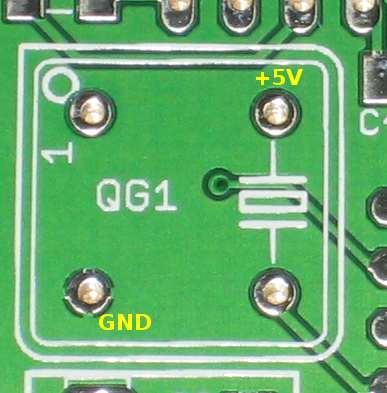
*'''QG1:''' Verify +5v across Vcc and GND of oscillator QG1 | |||
[[Image:mjlj_v4_qg1_vcheck.jpg]] | |||
<br><br> | |||
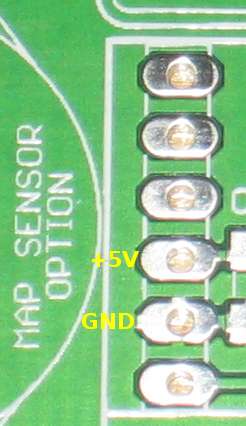
*'''PS1:''' If optioned for MAP, Verify +5v across PWR and GND pins of the MPX4250a | |||
[[Image:mjlj_V4_ps1_vcheck.jpg]] | |||
===Main Circuit=== | ===Main Circuit=== | ||
Revision as of 20:40, 21 June 2008
Precautions
Surface mount Components
The soldering portion of this kit was NOT designed for beginners!

The Megajolt Lite Jr. makes extensive use of surface mount components.
Hand-soldering SMT components requires advanced soldering skills and a steady hand.
Individual parts are tiny, and are therefore easy to overheat and damage.
If you are not comfortable assembling this kit after reviewing the instructions, we recommend you purchase a ready-made and tested unit from our online store, offered at a reasonable price.
Before you Begin
Familiarize
Read the instructions completely before soldering your first component.
Do not lose parts
- Leave the parts in their bags and protective tape: Remove them just before soldering.
- Tiny flying parts: Be careful when extracting the parts from the tape- they can go flying if the protective tape is removed too quickly. Also, ensure you have a good grip on the part with your tweezers- a missed tweezer grab can send the part flying.
- Work surfaces and floor: Work in a clean and open area, preferably with hard floors: if a part falls off the bench or flies away from a missed tweezer grab, it will be easier to find.
Lighting
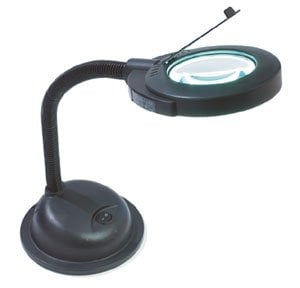
Use plenty of good lighting- best is to use bright overhead lights combined with an illuminated magnifying glass.
Note part orientation
Some components, such as diodes and capacitors are marked with a band indicating their orientation. The markings on these components can be faint- especially with the diodes. Be sure to positively identify the component orientation before soldering- good lighting will help this tremendously.
Do not overheat
Small parts are easy to damage- use minimal heat required for soldering components. It is essential a low wattage, fine-tipped soldering iron be used for assembly.
Assembling the kit
Tools you will need
Below are the essential tools you'll need for this project:
- A fine-tipped, low wattage soldering iron is necessary for precision work.
- Probably the best tool - a cross-action set of tweezers. This tool is normally closed, allowing you to hold parts with a relaxed grip and reduced tremors.
- Solder wick. Too much solder and you'll create ugly blobs and solder spikes. use this to clean up your joints by drawing away excess solder.
- A magnifying glass, preferably illuminated, is useful for identifying package markings and inspecting solder joints.
Parts Inventory
| Part | Type | Value | Photo |
|---|---|---|---|
| R3 | Resistor | 1K | 
|
| C11 | Capacitor | 0.1uF | 
|
| C12 | Capacitor | 0.001uF | 
|
| C13 | Capacitor | 0.22uF | 
|
| C14 | Capacitor | 15uf | 
|
| D5 | Diode | Schottky Diode | |
| L1 | Inductor | 1uH | 
|
| Part | Type | Value | Photo |
|---|---|---|---|
| R4 | Resistor | 270 ohm | 
|
| C8,C9 | Capacitor | 0.1uF | 
|
| PS1 | Sensor | MPX4250ap | 
|
| Fastener | Zip Tie | 
|
Surface Mount Parts
Power supply Circuit
Prepare solder pads
Prepare the component pads by adding a small blob of solder to only one of the pads for the following components: U3, D1, D2, D3, D4, C2, R9.
TIP: It's important you only add solder to one component pad:
if more than one pad is prepared, it will be extremely difficult to install the part flush to the board!
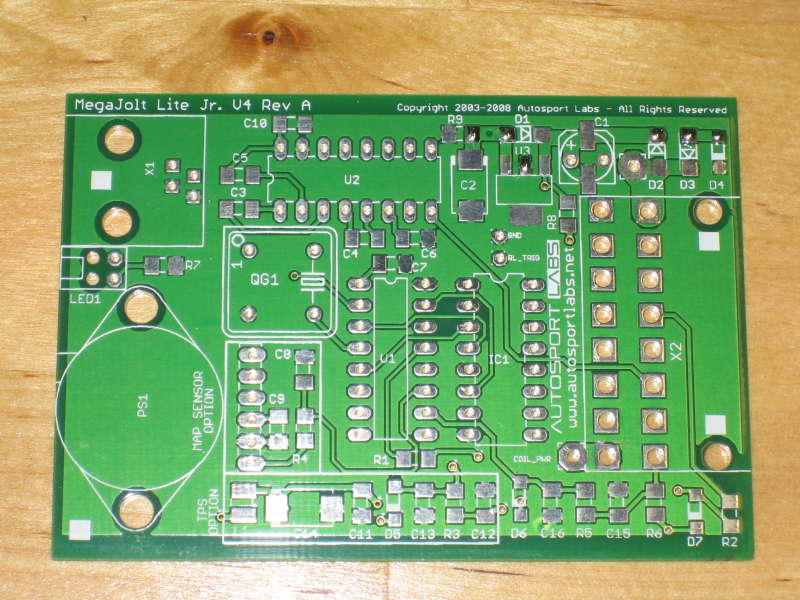
Components
Install the following components in order, from the power supply bag:
- U3: LM2937-5.0 Voltage regulator. Heat up the prepared solder pad and slide the part into position. Once tacked into place, ensure the part is flush against the board. Solder the remaining pins, including the large tab!
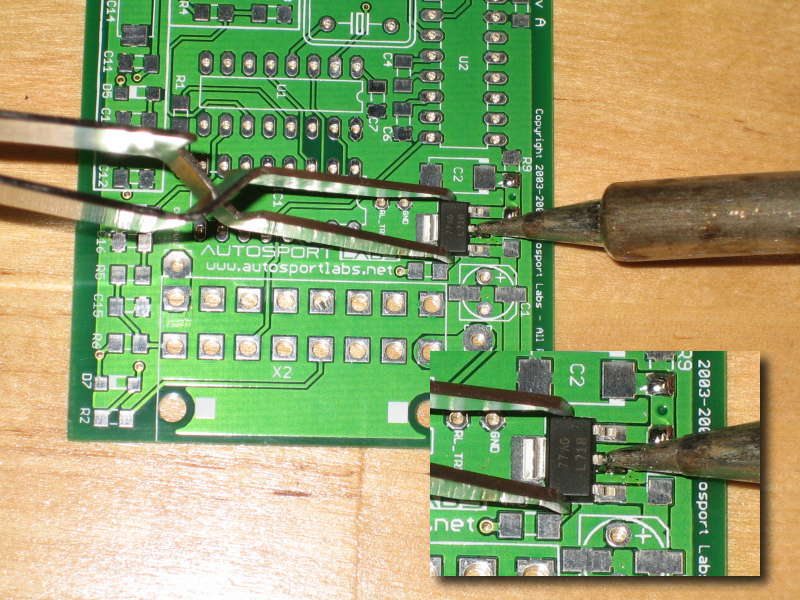
- D1,D2,D3: 1A 400V diode. Note stripe orientation: The silk-screened arrow on the PC board points to the side with the stripe.
- D4: 12V Zener diode. Note stripe orientation: The silk-screened stripe on the PC board matches the diode's stripe.
The stripe on the diodes can be hard to see.
If you have difficulty identifying them, increase the lighting- bright light is essential.
Also try tilting the device to reduce reflections.

DO NOT install the part until you are confident the orientation is correct!!
- C2: 33uF tantalum. Note stripe orientation: ensure it matches stripe on PC Board.
- C1: Most kit builders will be working with the board on a flat surface- if so, it's best you install C1 along with the other through-hole components, after all surface mount components are installed.
- R9: 680 ohm resistor
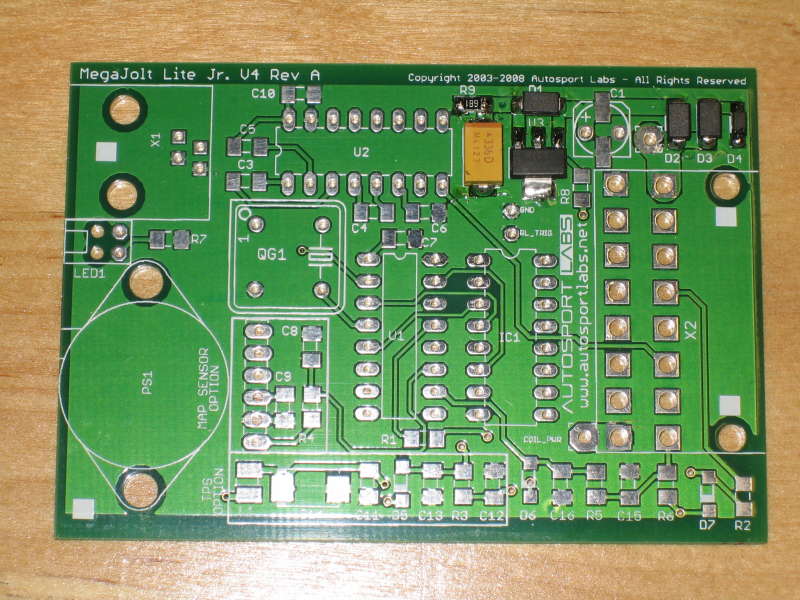
Testing Voltages
Test voltages at the following locations:
- Power supply components:
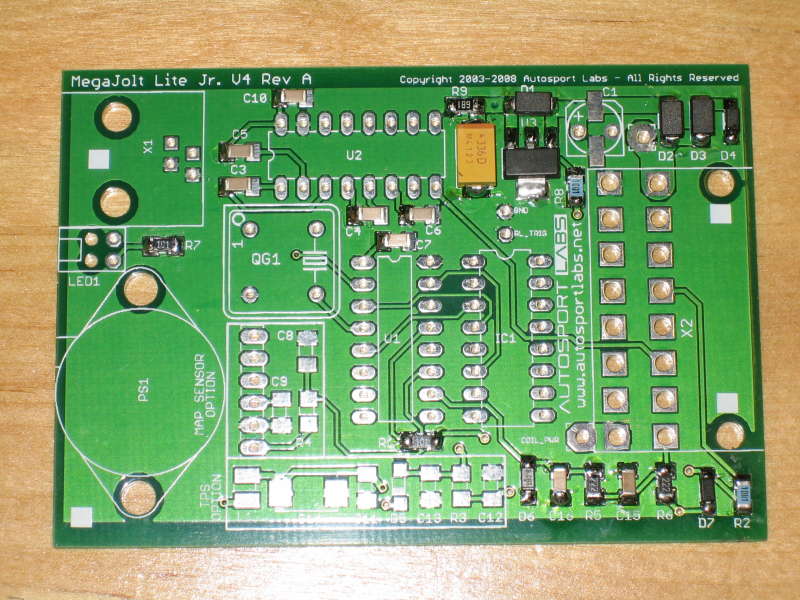
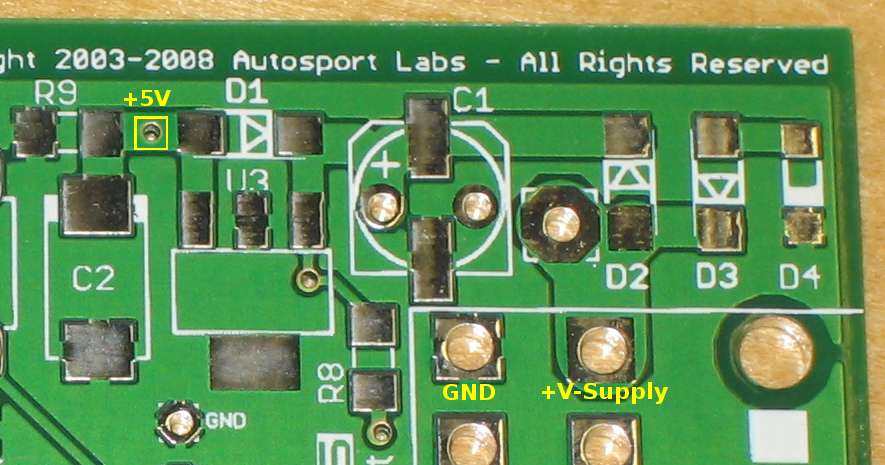
Apply power to the Molex pads shown in the image using a low current, 9 - 12v power supply source. A 9V battery is ideal for testing.
Verify +5v at the test point. if the test point is covered with green solder mask, you can test on the adjacent pads on D1 or R9.
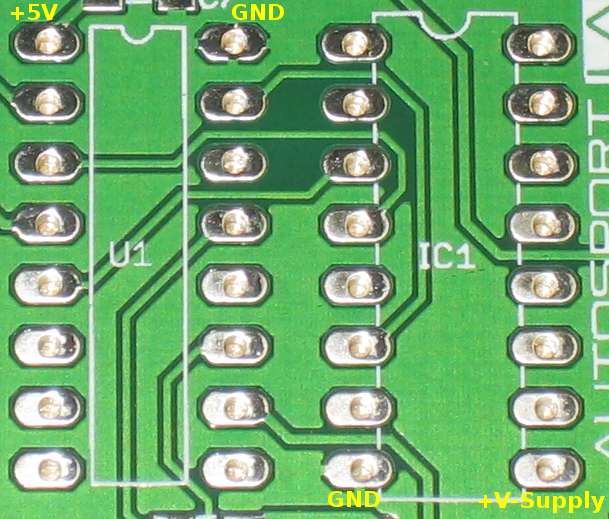
- U1: Verify +5v across the Vdd, Vss pins of U1
- IC1: Verify approximately +V-Supply (about .6 volts lower than +V-Supply) across the IC1 CD+ and Gnd pins
- U2: Verify +5v across Vcc and GND pins of U2
- QG1: Verify +5v across Vcc and GND of oscillator QG1
- PS1: If optioned for MAP, Verify +5v across PWR and GND pins of the MPX4250a
Main Circuit
Prepare Solder Pads
As with the Power supply circuit, add a small amount of solder to only one of the solder pads for the following components:
C3,C4,C5,C6,C7,C10,R1,R7,R2,R8,R5,R6,D6,D7,C15,C16
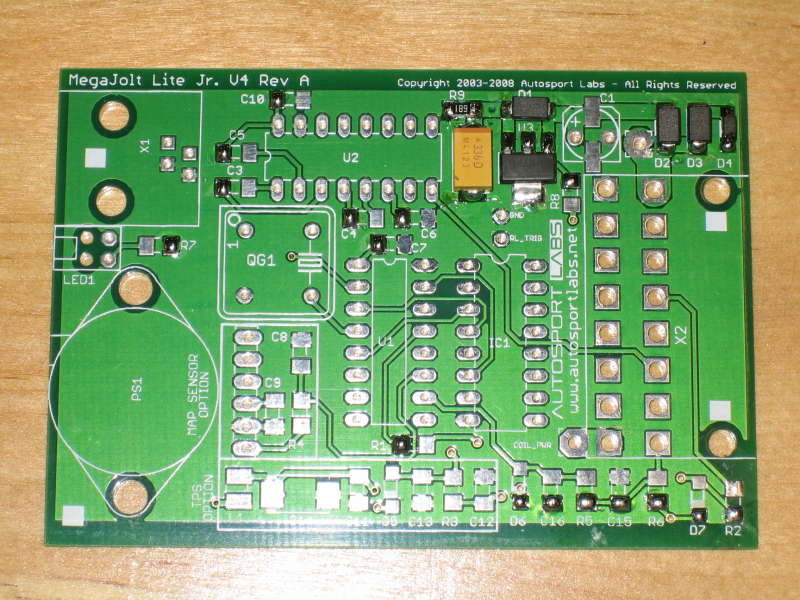
Components
Install the following components in order, from the core components bag:
- R1,R7: 100 ohm resistor (resistor package marked 101)
- R2,R8: 1K resistor (marked 1001)
- R5,R6: 2.2K resistor (marked 222)
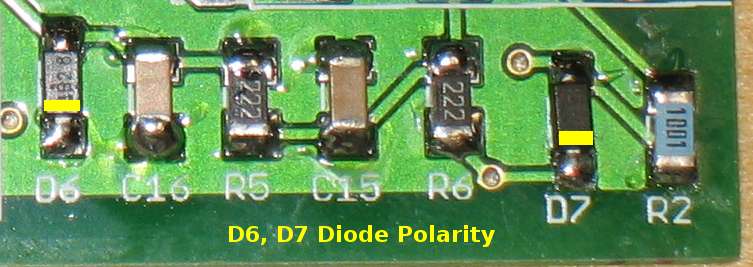
- D6,D7: Schottky diode (strip of two diodes, SOD-123 package
 Note Polarity: Stripe on diode package towards bottom edge of board.
 - C15: 0.001uF capacitor (strip of one capacitor, RED stripe on tape)
- C16: 0.22uF capacitor (strip of one capacitor, VIOLET stripe on tape)
- C4,C6,C7,C10,C5,C3: 0.1uF capacitor (strip of 6 capacitors, ORANGE stripe on tape)
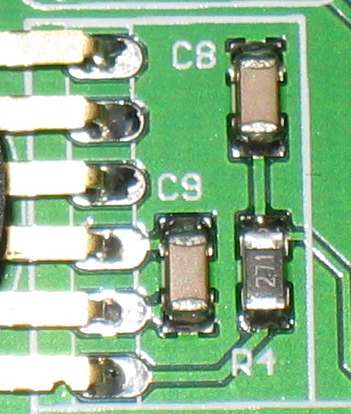
MAP sensor option
Prepare the board by adding solder to only one pad for the following components: R4,C8,C9
Install the following MAP sensor components from the MAP sensor option bag:
- C9,C8: 0.1uF capacitor (strip of 2 capacitors, ORANGE stripe on tape)
- R4: 270 ohm resistor (resistor package marked 271)
TPS option
Prepare the board by adding solder to only one pad for the following components: C12,R3,C13,D5,C11,C14,L1

Install the following TPS option components from the TPS options bag:
- C12: 0.001uF capacitor (strip of one capacitor, RED stripe on tape)
- R3: 1K resistor (resistor package marked 1001)
- C13: 0.22uF capacitor (strip of one capacitor, VIOLET stripe on tape)
- D5: Schottky Diode (strip of one diode, SOD-123 package
 ) Note polarity: stripe on diode package oriented towards bottom of board.
 - C11: 0.1uF capacitor (strip of one capacitor, ORANGE stripe on tape)
- C14: 15uF capacitor (grey tantalum package) Note polarity Match stripe on component with stripe on board.
- L1: 1uH inductor (strip of one inductor, 1210 package:
 )
)

Testing Voltages
Re-apply power to power input pads and re-test voltages at the following locations:
- U1
- U2
- IC1
- QG1
- PS1
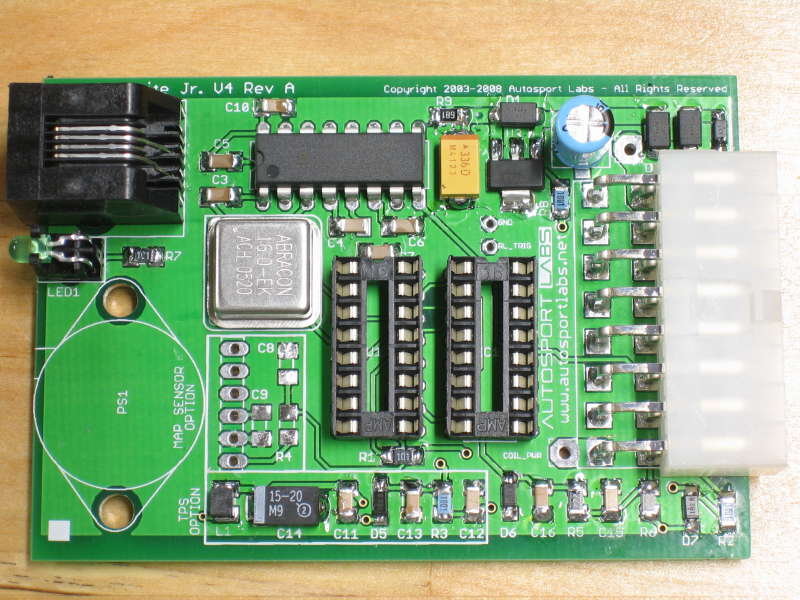
Through Hole Parts
IMPORTANT: It is extremely important you install the through-hole components with the correct orientation! De-soldering a backwards-installed component is extremely difficult and will likely damage the board.
GET IT RIGHT THE FIRST TIME!
Install Components
Install the following components:
- U1 16 pin DIP socket: Note notch orientation. Ensure socket is flush against board.
- IC1 16 pin DIP Socket: Note notch orientation
- U2: MAX232A (or equivalent) Note notch orientation
TIP: for the sockets and U2, solder only one pin and check for part flatness against board.
You may need to re-heat the pad while squeezing the part against the board. Once you are
satisfied, you can solder the rest of the pins.
- C1: 33uF electrolytic capacitor. Note orientation: (-) stripe on capacitor must be opposite of + mark on board; towards molex connector
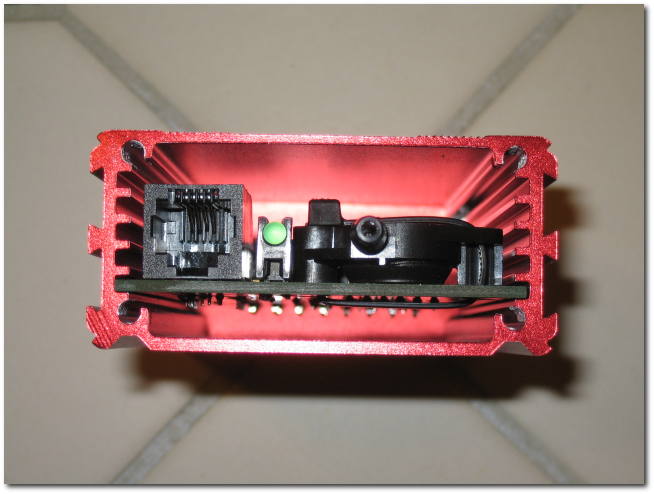
- LED1: Right angle green LED. ensure this is completely flush against board as it must align with hole in case end plate.
- QG1: 16MHz oscillator. Note orientation of package- sharp corner must match sharp corner on board silkscreen.
- X1: RJ11 Modular Jack. Snap connector into place and verify connector is square against board before soldering, as it must align with hole in case end plate.
- X2: 16 pin right angle molex connector. Snap into place and ensure connector is flat and square against board before soldering.
TIP: solder pins on opposite corners, and re-check the connector is flat and square against the board.
If not perfect, re-heat solder near the affected corner and correct the connector's position.
MAP Sensor Option
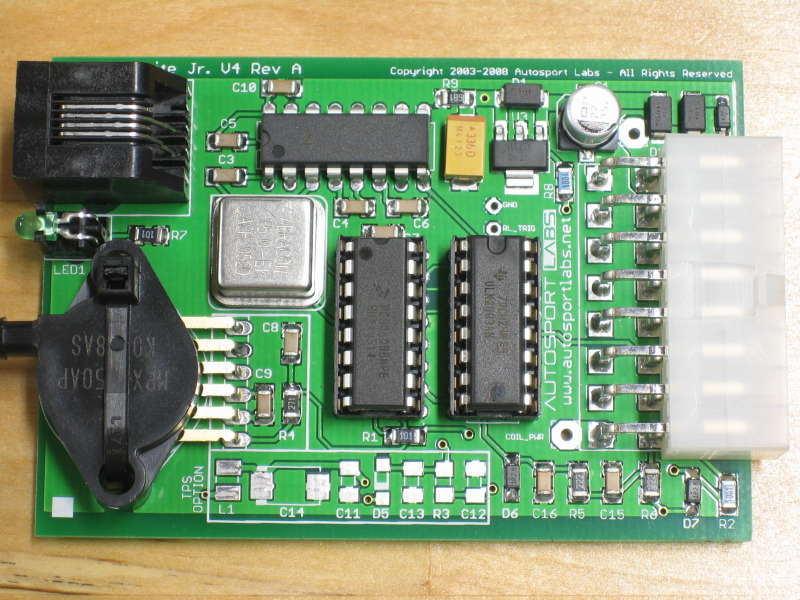
Install the MAP sensor with the case markings pointing up, and the sensor pressure port matching the silk-screened pattern on the board. Bend the sensor leads at a right angle, right where the leads widen.
Attach the sensor tightly to the board using the supplied zip tie. Solder the sensor into place.
TIP: Use a small pair of pliers to tighten the zip tie:
The zip tie should be flat and square around the board with no slack
and the sensor should be reasonably difficult to shift side-side.
Testing Voltages
Re-apply power to power input pads and re-test voltages at the following locations:
- U1
- U2
- IC1
- QG1
- PS1
You should also observe the power LED illuminate.
Installing ICs
- U1: Install MJLJ V4 Processor Freescale MC908QB8. Note notch orientation
- IC1: Install ULN2003 transistor array Note notch orientation
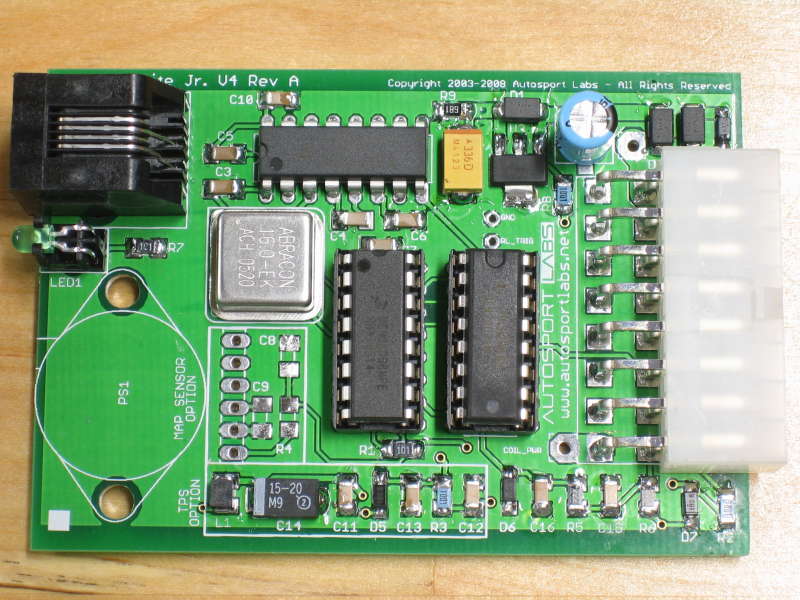
Complete board assembly, MAP version
Final Inspection
TIP: An illuminated magnifying glass is great for getting an up-close inspection of your work!
Solder joints
Carefully check the top and bottom of board for solder joint quality- all joints should be bright and shiny, minimal blobbing, no solder 'spikes' or bridges.
And, of course- look for missed solder joints!
Part placement
- Ensure all through hole components are flush.
- Re-check part orientations: polarity on electrolytic and tantalum capacitor, orientation on diodes, and orientation on ICs and oscillator.
Additional Options
Hard Rev Limiter Module
If you are installing a Hard Rev Limiter module inside the MJLJ enclosure, see the Hard Rev Limiter build and installation guide.
Enclosure installation
Slide the board into the bottom slot of the case. Install the end plate for the molex connector first.
TIP: the molex connector is slightly off-center, so it's easier to align the plate with the board installed first.
If you purchased the case mounting flanges, slide them into the grooves on either side of the case.
Finally, install the opposite end plate
TIP: the LED may tilt up while you're installing the plate. If this is problematic, a dot of super glue between the led and board may help.
Testing
Verification on the bench
Power the unit with a 9V battery through the molex connector, and connect your unit to your computer using an appropriate serial tuning cable through the RJ11 connector adjacent to the power LED.
If the unit is alive you will be able to communicate with it using the PC Configuration software. See the first few steps in the Operation Guide.
Next Steps
Installation: See the Vehicle Installation Guide
Operation and Usage: See the Operation Guide


