Helmet mic: Difference between revisions
No edit summary |
|||
| Line 1: | Line 1: | ||
==Introduction== | ==Introduction== | ||
[http:// | <center>'''[http://youtu.be/bET9PULBRbk See the video how-to here]'''</center> | ||
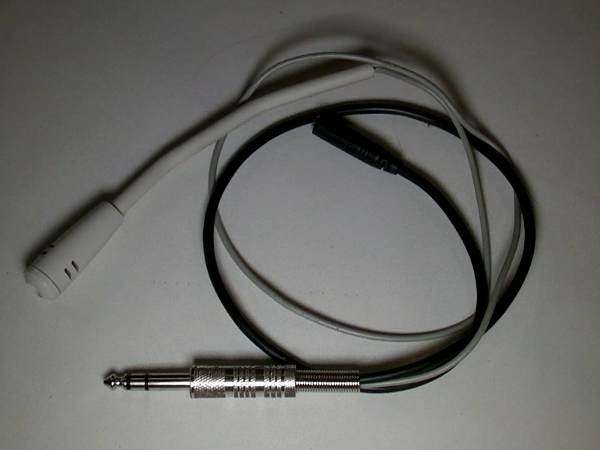
[[Image:diy_helmet_mic_small.jpg|frame|DIY Helmet Mic]] | [[Image:diy_helmet_mic_small.jpg|frame|DIY Helmet Mic]] | ||
Revision as of 06:43, 15 August 2012
Introduction
Background
A Race Car radio setup is already expensive, as a quality UHF race car radio system can cost between $500 and $700 USD, when you factor in the radios, race car harness and pit headset.
On top of this cost, you will need a helmet microphone & earbud setup. Commercial helmet mics can cost around $100 - this adds up quickly if your're running an endurance racing team like 24 Hours Of Lemons or ChumpCar and you need to outfit 4 to 6 drivers!
This article shows you how to build you own helmet mic for about $10 in parts.
Parts you will need
- Earbuds
- Find any earbuds that fit comfortably and securely in your ears. The ones that mold to your ear shape are ideal, as they won't pull out of your ears when you put that tight helmet on.
- A commodity PC microphone
- Find one that uses an 1/8" jack to plug into a conventional microphone connection. Do not use a USB microphone. These microphones can be cheaply found at your local PC recycler for a few dollars a piece.
- 1/4" stereo phono plug
- Source from Radio Shack or equivalent supplier, or hack up an existing cable to avoid soldering! The 1/4" phono jack fits race car harnesses using the "Nascar Connector" scheme. It's important you get a matching race car harness!
- 1/8" headphone jack
- Source from Radio Shack or similar supplier. You can also hack up an headphone extension cable to avoid soldering
- 10K 1/4W resistor
- This is required for proper microphone operation
- Wire
- Single or twin conductor shielded wire to connect the headphone jack to the phono plug. Omit this if you're using the headphone extension cable!
Assembly
Microphone Connection
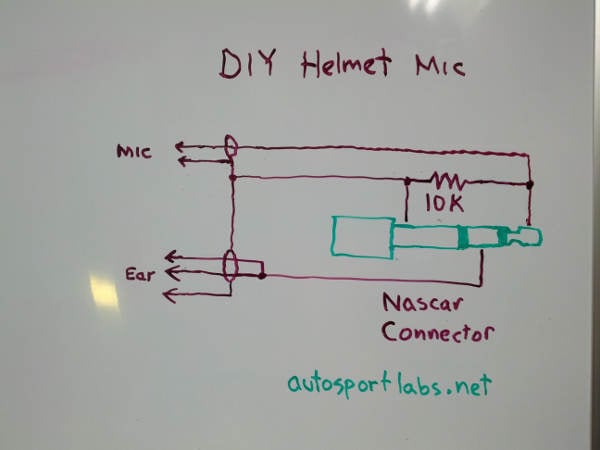
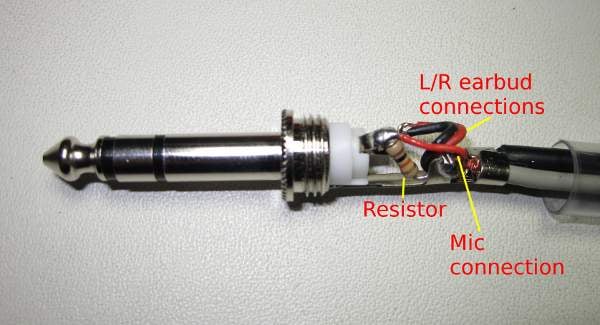
cut the microphone wire, leaving about 12" of cable. Strip back the insulation to reveal the shield and the single wire inside (typically red). This is the microphone signal. Solder this to the tip connection of the 1/4" phono jack.
Earbud Connection
Solder the middle segment of the 1/4" phono jack to the left and right signals of the earbud jack. On the earbud jack this is the tip and middle segment.
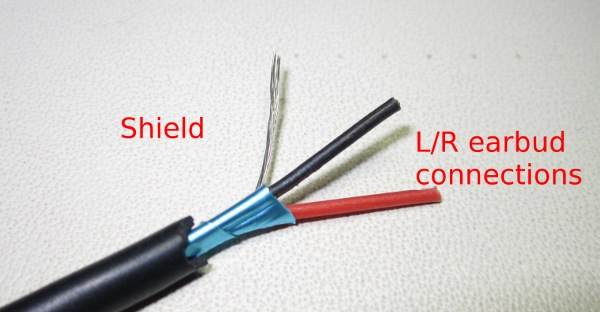
If you're using the headphone extension cable, cut this cable short so you have about 12" of cable from the 1/8" jack, then strip back the insulation from the wire. Separate the shield from the two wires (typically red/black). Connect these two wires to the middle conductor of the 1/4" phono jack.
Shield Connection
Solder the shield of the microphone cable to the base segment of the 1/4" phono jack; do the same with the shield of the microphone cable.
Resistor
Solder the 10K resistor between the tip and the base of the 1/4" phono jack. The resistor is small enough where you can install it right into the housing of the jack.
Images
Testing
Plug your earbuds into the 1/8" jack, then plug the 1/4" phono jack into the wiring harness of the race car. Turn on your radios, press the push to talk button and you should be able to communicate with the other radio!
Installation
Depending on the helmet design, you can weave the microphone and cable behind and between the padding of the helmet. Position the microphone so it's as close to your lips as possible. You can install zip tie anchors to your helmet to provide strain relief and a more finished look.

