MJLJ V3 vehicle installation guide: Difference between revisions

(adding references for timing wheel)
No edit summary
Line 1: Line 1:
==Crank trigger wheel and sensor installation==
==EDIS installation==


Line 6: Line 4:
[[Image:edis_wheel.gif|520px]]<br/>
[[Image:edis_wheel.gif|520px]]<br/>
'''''Shown: Relationship between engine Top Dead Center and sensor positioning. Wherever you place the sensor, the distance from the missing tooth must remain constant.'''''
</center>
<center>
[[Image:edis_sensor_bracket.jpg]]
</center>
</center>


<center>
<center>
[[Image:timing_wheel_end.jpg]]
[[Image:edis_sensor_bracket.jpg|right|VR Sensor and bracket|320px]]
</center>
</center>


<center>
<center>
[[Image:timing_wheel_face.jpg]]
[[Image:timing_wheel_face.jpg|right|Machined crank pulley with timing adapted|320px]]
</center>
</center>


<center>
<center>
[[Image:timing_wheel_face_close1.jpg]]
[[Image:timing_wheel_face_close2.jpg|right|Closeup view of adapted timing wheel|320px]]
</center>
</center>


<center>
<center>
[[Image:timing_wheel_face_close2.jpg]]
[[Image:timing_wheel_end.jpg|right|Machined pulley with timing wheel adapted|320px]]
</center>
</center>


<center>
<center>
[[Image:timing_wheel_mounted.jpg]]
[[Image:timing_wheel_mounted.jpg|right|Modified crank pulley mounted with VR Sensor|320px]]
</center>
</center>


Line 51: Line 44:
**It's strongly recommended you power the EDIS module and MJLJ from the same electrical circuit. Typically this will be +12V switched (Key to "on" position)
**'''Important! - Ground both the EDIS and MJLJ at the same point on the chassis.'''
==Installing the MJLJ==
<center>
[[Image:MJLJ_V3_Wiring_Harness.png]]
</center>
===MJLJ wiring notes and guidelines===
*The MJLJ should be installed inside the passenger compartment. It's not designed to handle the temperature,vibration and moisture extremes of the engine bay.
*Use shielded cable for the PIP/SAW signal between the MJLJ and EDIS module. Be sure to ground the shield as well. A 2-conductor cable with a foil shield works well.
*Use 16 gauge wire for the MJLJ ground connection. 18-20 gauge wiring is fine for power and the other connections.
*For MAP based setups ignore the TPS connections.
===Interfacing to Tachometers===
====Using the TACH OUT on the MJLJ====
Many tachometers can accept the signal emitted from the TACH OUT on the MJLJ module. This TACH OUT signal provides a 12V pulse for every ignition event. You may use this to provide the signal to compatible tachometers.
====Tachometers that require a high-voltage kickback pulse====
Some OEM-style tachometers detect the RPM signal by sensing the high voltage fly back pulse from the ignition coil. In distributor based setups, there is only one ignition coil to detect this pulse from. With a wasted spark system, this 'signal' is spread across multiple coils. As a result, you will need a way to combine these pulses across multiple coil packs to drive your tachometer.
The following circuit allows the fly back pulse to be detected across individual coil packs while still isolating the coils from each other.
<center>
[[Image:tach_circuit.jpg]]<br/>
''OEM tachometer adapter circuit''<br>
''If the above circuit does not work, try omitting the Zener diode.''
</center>
===User defined outputs and Shift Light===
The four User defined outputs provided by the MJLJ can be set to trigger on either RPM or Load thresholds. The separate 'shift light' output triggers only on RPM, but otherwise behaves identically to the user outputs.
Starting with V3.1 firmware the user outputs have hysteresis control. For RPM, the hysteresis threshold is 100 RPM; for Load, the threshold is 1 KPa or 1% TPS.
The configuration of these outputs is provided by the PC configuration software, covered in a later section.
Each output can supply up to 500mA, which is enough to drive LEDs, small incandescent lamps, relays, and small solenoid valves. If you are unsure on the amount of current drawn by the accessory, you can power it manually and measure it's current using a Volt-Ohm-Amp meter.
Accessories that have a higher current demand can be controlled by relays, with the MJLJ output driving the relay.
Should you exceed the current capacity of one or more of the user defined outputs and damage the IC that drives the user outputs (ULN2003 darlington array), replace the chip with a new unit- it is socketed for this specific reason.
<center>
[[Image:MJLJ_User_output_examples.png]]
</center>
===Enabling Option Switch (For MJLJ firmware > 3.1.0)===
For MJLJ firmware versions 3.1.0 and later, the Option input is used to enable on-the-fly switching between Ignition Configurations, controllable via a dash mounted switch.
To enable this feature you must have controller firmware V3.1.0 or later installed, and the feature must be enabled in the controller (covered later). Wire the switch based on how your MJLJ is optioned; use the following diagram as a guide:
<center>
[[Image:MJLJ_V3_wiring_option_switch.png]]
</center>
===Rev Limit control===
The ford EDIS system offers no direct ability to disable the ignition coils in an over-rev condition. The indirect way to enable this is through an external circuit that disables power to the ignition coil(s).
The MJLJ offers an output that triggers on the configured rev-limit. An additional feature of the Rev Limit functionality is tha the ignition advance automatically goes to zero 100 RPMs before the configured limit, offering a softer approach to the hard limit.
We are currently developing an external board that accepts this rev limit output and disables the ignition coil(s) when activated.
Current experimental techniques involve either using a mechanical relay to cut power to the coils, or tie the coil (-) to +12V through a current limiting resistor, suppressing spark by preventing the sudden collapse of the coil's magnetic field.
<!--
==MJLJ Operation==
===PC Connection with Configuration Software===
===Fetching Ignition configuration===
===Editing Ignition Map===
===Calibrating TPS===
===Configuring user-defined outputs===
===Interactive Tuning===
===Data logging===
-->

Revision as of 05:49, 18 March 2007

EDIS installation
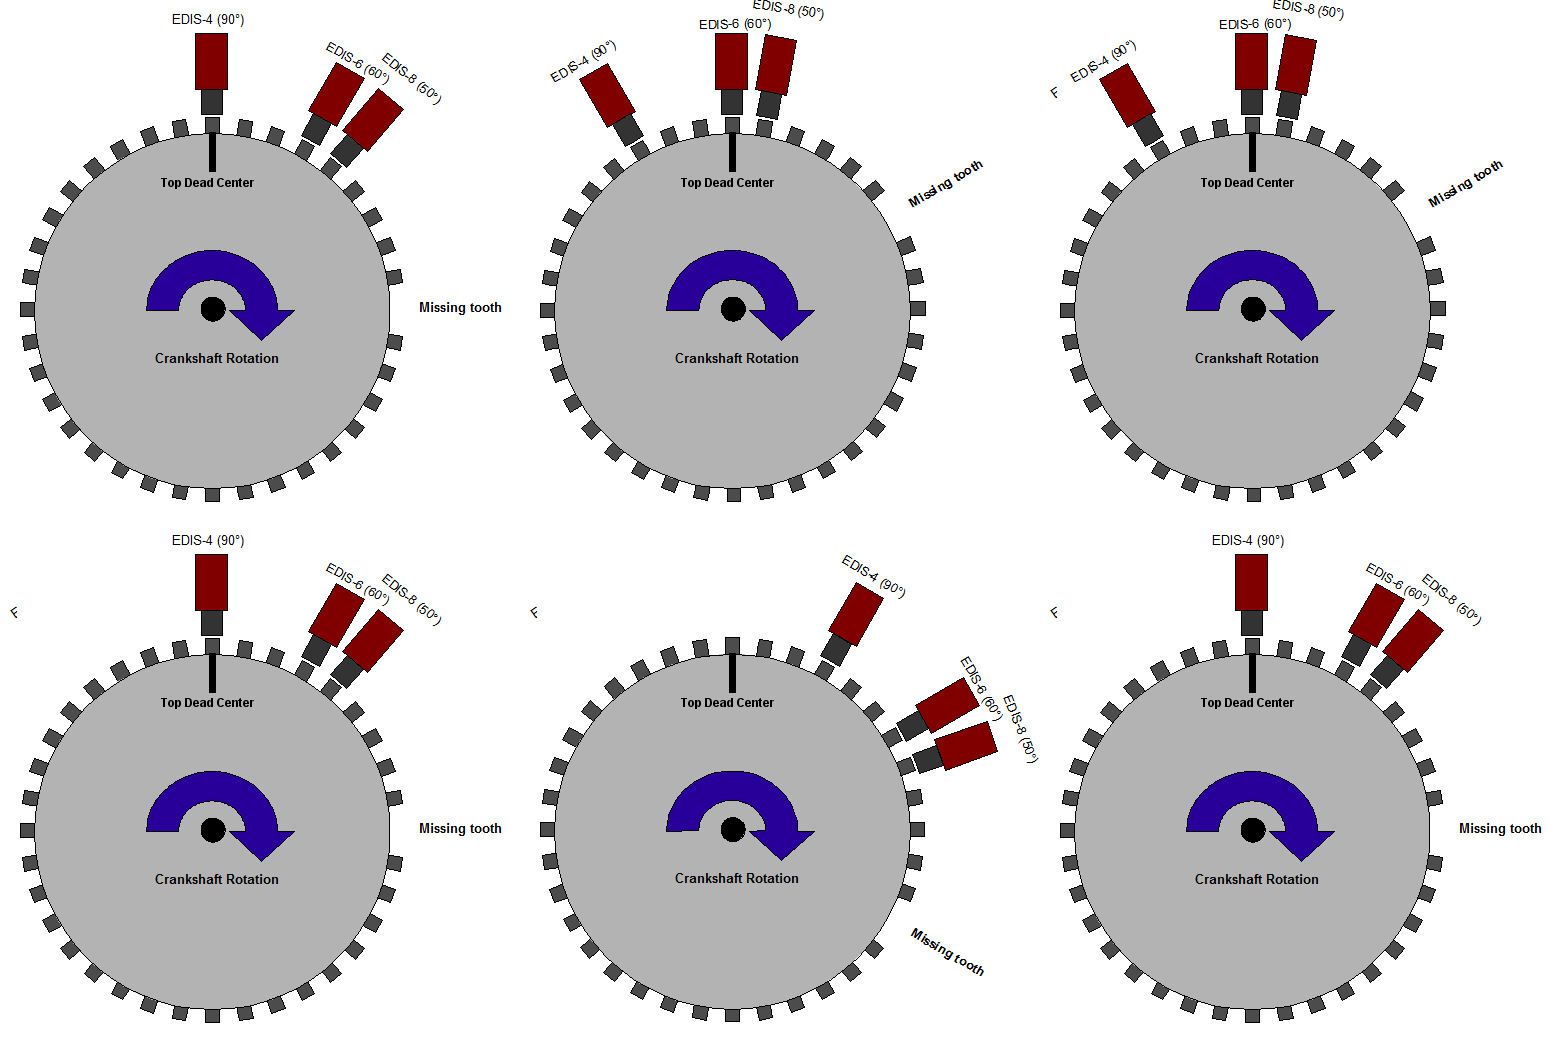
Edis wheel.gif
Shown: Relationship between engine Top Dead Center and sensor positioning. Wherever you place the sensor, the distance from the missing tooth must remain constant.

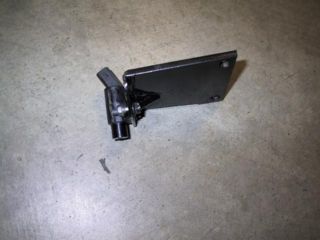
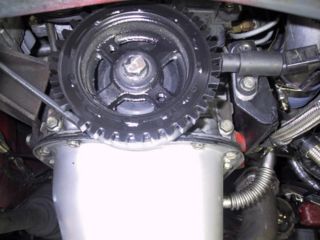
VR Sensor and bracket
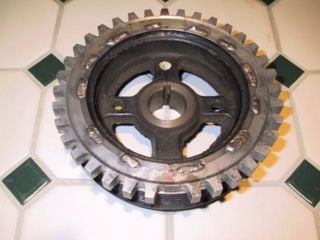
Machined crank pulley with timing adapted
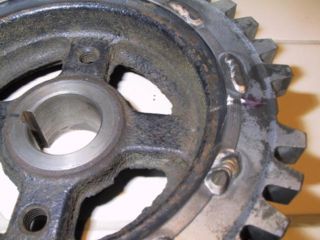
Closeup view of adapted timing wheel
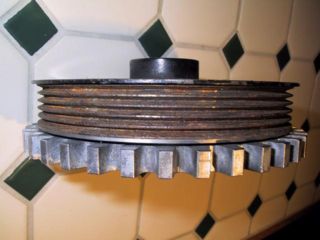
Machined pulley with timing wheel adapted
Modified crank pulley mounted with VR Sensor


EDIS and coil-pack installation

Since the EDIS module can operate the engine by itself in a "limp-home" mode, with the advance fixed at 10 degrees BTDC, it's recommended you install the EDIS module and coil packs first, and then verify your engine runs before wiring in the MJLJ.

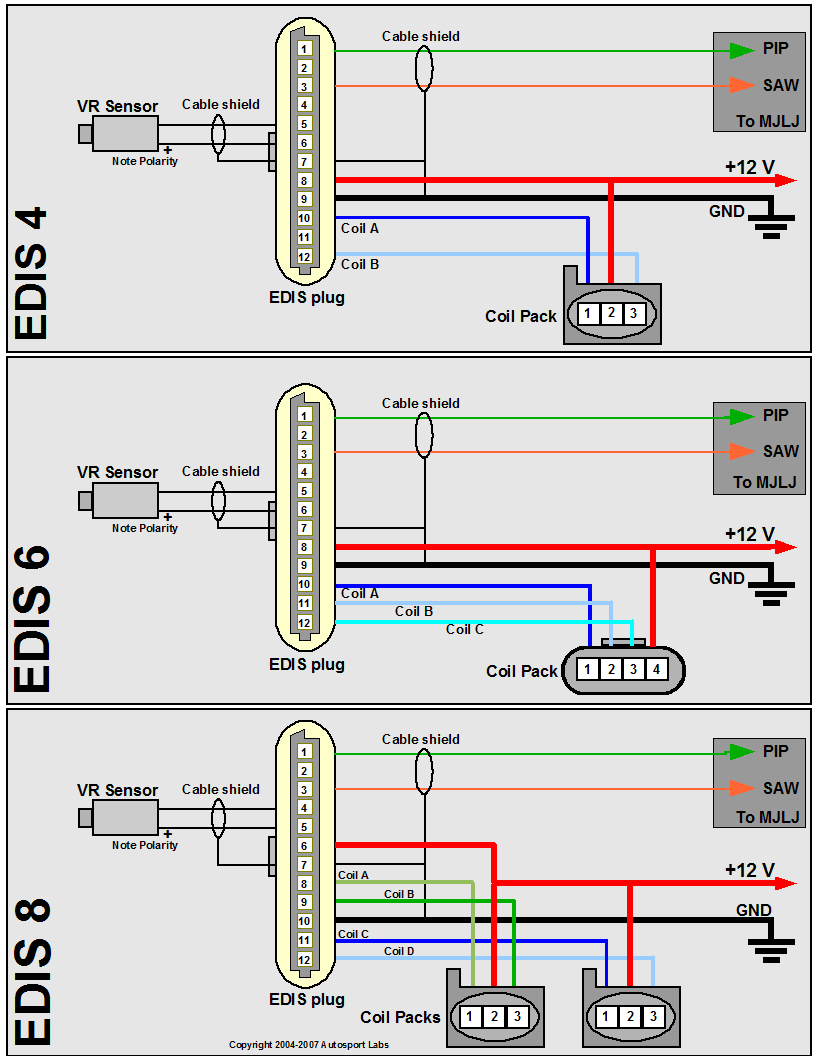
Wire up the EDIS module and coil pack(s) using the following diagram, matching your engine type (EDIS 4 = 4 cylinder, EDIS 6 = 6 cylinder, EDIS 8 = 8 cylinder). Engines with 'even-fire' configurations are supported, which represents the vast majority of 4,6, and 8 cylinder engines in production.

EDIS Module harness.png

Wiring notes and guidelines

  • Use shielded cable for the VR Sensor. Be sure to ground the shield as well. A 2 conductor cable with a foil shield works well.
  • Note the VR sensor is polarized- you will not get spark from the EDIS module if it is wired backwards. If you don't see spark, try reversing the connection on the VR sensor.
  • Minimize supply voltage variances and especially ground loop problems:
    • It's strongly recommended you power the EDIS module and MJLJ from the same electrical circuit. Typically this will be +12V switched (Key to "on" position)
    • Important! - Ground both the EDIS and MJLJ at the same point on the chassis.