RaceCapture on Raspberry Pi: Difference between revisions
| Line 67: | Line 67: | ||
===Heat sinking=== | ===Heat sinking=== | ||
If you're running in hot weather, we recommend the standard Raspberry Pi heatsink kit to keep your system cool. | If you're running in hot weather, we recommend the standard Raspberry Pi heatsink kit to keep your system cool. | ||
For Pi4 users, we recommend active fan cooling in addition to the heat sink. | |||
=Installation= | =Installation= | ||
Revision as of 16:01, 18 November 2021
Introduction
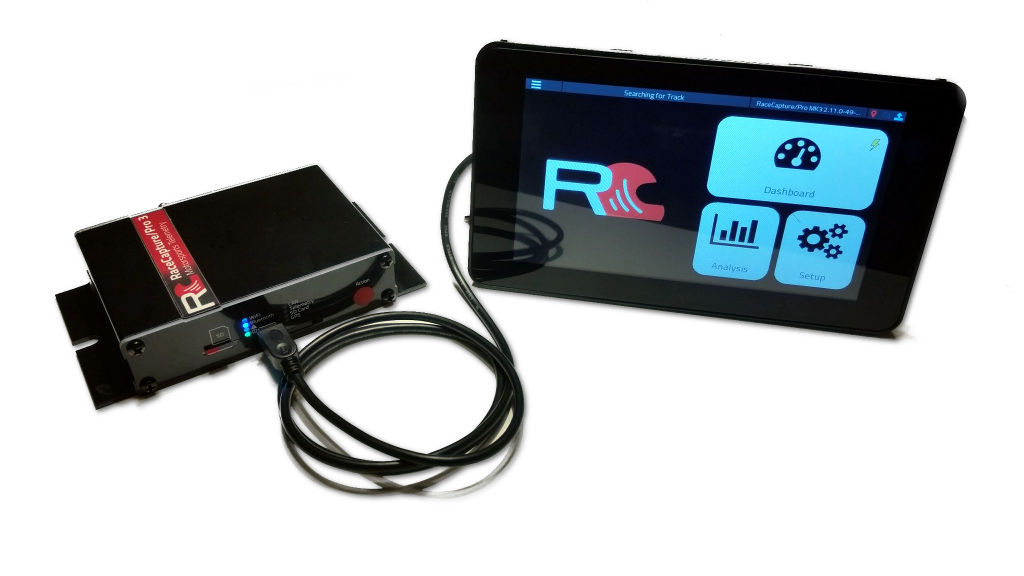
We designed the RaceCapture app to run nearly anywhere - even a Raspberry Pi. And now, for about $100 you can create a hardwired, dedicated dash for your RaceCapture system.
Benefits
You get all of the benefits of a dedicated dash:
- Automatically runs upon power up - you can configure the dash to automatically launch the RaceCapture App - just as you'd expect it to work.
- Hard-wired data connection to RaceCapture - no wireless connections to configure, with the reliability of a direct wire.
- Runs on the bare metal - The RaceCapture app runs without Android or iOS; there's no other apps competing for resources, or compromising system stability.
- Overheating resistance - Your typical mobile device requires extra care in very hot weather to prevent damage to it's internal battery, and will shut down if overheated. With proper heat-sinking, the Raspberry Pi should handle the heat.
Compatibility
The RaceCapture app running on the Raspberry Pi is compatible with any hardware version of RaceCapture or PodiumConnect.
Experimental!
While the results are pretty great, these instructions are currently for those adventurous race car hackers who know their away around a command line, comfortable working with hardware and want to dig in. Think it's cool, but too much to tackle? Rope in your nearest computer/electronics geek - you need one on your race team, anyway. :) Or, just use the plug and play option and use an Android or iOS device via Bluetooth or WiFi.
Current status and future plans
Even though this is brand new and officially experimental in nature, we still made it as easy as reasonably possible: we wrapped up the RaceCapture App into as close to a self-running installer, that can run on a bone stock Raspberry Pi image - only a few changes are required to the default image, detailed below.
However, in the near future we will create a dedicated Raspberry Pi image that you can burn to an SD card and simply boot up, and move towards more official support as we iron out the issues.
Reporting issues and getting support
Chances are you'll encounter an issue you'll want to report. Before you do that, check the issue log to see if it's already known.
Otherwise - the best place for support, feedback and sharing success stories is on the forums . Drop us a note there so we can see the progress of your project!
Hardware Selection
Raspberry Pi
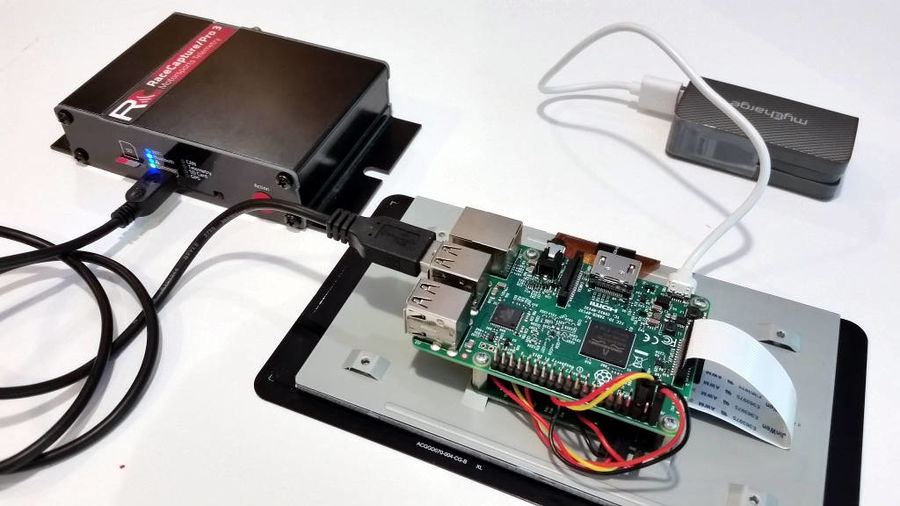
RaceCapture currently requires the Raspberry Pi 3: Raspberry Pi 3.
It is not yet compatible with the Pi 4, due to extensive changes in the graphics subsystem. Expect to see Pi 4 support in the 2.0 version of the app.
Display
The RaceCapture app package is designed to recognize the following screens:
- Official Raspberry Pi display with capacitive touch screen;
- Displays supporting the AR1100 resistive touch screen controller.
Other displays can work as well, and additional work may be needed to support the screen's touch controller. If unsure, just pick the Official Raspberry Pi display
Enclosure
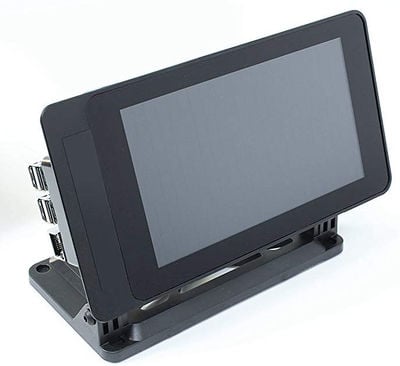
A recommended enclosure is the Smart Pi Touch Case
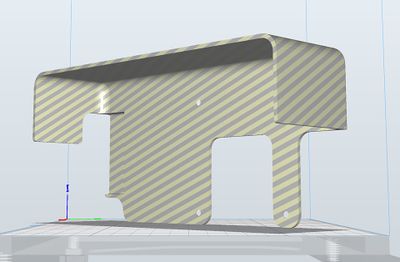
You can 3D print a sun shade for this enclosure File:P001 Raspberry Pi Display Sun Shade.stl.zip (Courtesy of Michael Lee)
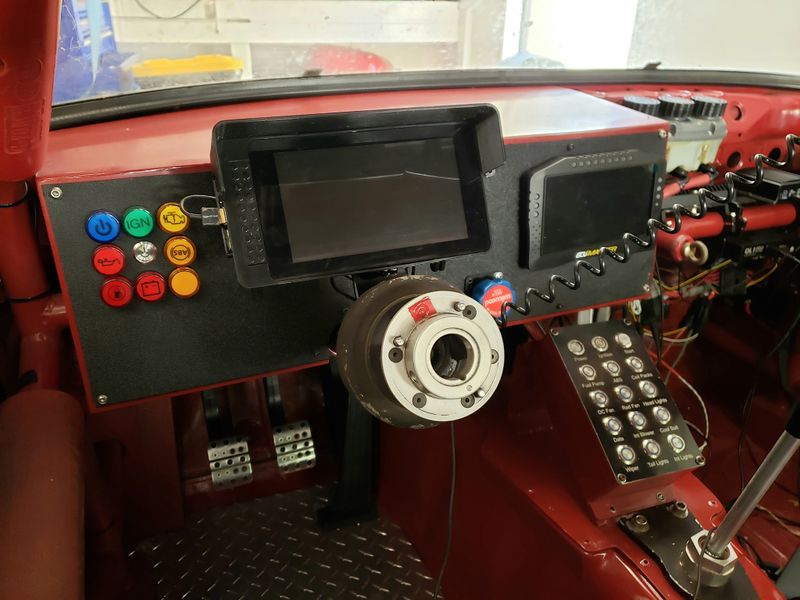
Installed on Dashboard
Power Supply
The Raspberry Pi dashboard requires its own power supply. You'll need a high quality 5v power supply with 2 amps minimum capacity; 3 amps is highly recommended, and ideally one with a low drop out voltage, so power is not cut to the Raspberry Pi when you're loading the main battery, such as when cranking the engine.
Suggested Power Supplies
Powering RaceCapture
After you have power to the Raspberry Pi dashboard, you may notice your RaceCapture device will be powered by the USB cable connected to the Pi, just as if you're powering RaceCapture from your laptop. You will still want to power your RaceCapture via 12v; see the respective installation guides for information on how to power your device.
Heat sinking
If you're running in hot weather, we recommend the standard Raspberry Pi heatsink kit to keep your system cool.
For Pi4 users, we recommend active fan cooling in addition to the heat sink.
Installation
Installing Rasbian OS
We recommend installing the latest Lite distribution - download from the official site and follow the instructions for burning to an SD card.
Once you've created your image, boot up your Raspberry Pi and log in with the default username of 'pi' and password 'raspberry'.
Updating to latest packages
It is always good form to update the latest packages after a fresh install. Enter this at the command line:
sudo apt-get update
sudo apt-get dist-upgrade
Raspberry Pi support
The RaceCapture app is compatible with Raspberry Pi 4 and 3.
Raspberry Pi 4 Notes
Raspberry Pi 4 support is only available with the V2 Beta app, see our Discord channel to access testing.
Raspberry Pi 3 Notes
Enable Fake KMS under advanced boot options:
sudo raspi-config
Go to Advanced Options -> GL Driver -> Select OpenGL desktop driver with fake KMS
- Be sure to reboot after exiting raspi-config
Installing dependencies
Activate ssh
Ssh is used to store passwords used by the app. Steps to ensure it is running:
sudo raspi-config
Go under Advanced Options and start the ssh service.
Next, at the command prompt enter
ssh-add
to create at least one key.
Install package dependencies
sudo apt-get install mesa-utils libgles2 libegl1-mesa libegl-mesa0
Change the default password
For maximum security, change the password for the default user 'pi'
> passwd
and specify a new, secure password.
Configure Raspberry Pi base settings
Enable Hardware rendering
Enter the following line to enable hardware accelerated rendering.
> sudo adduser pi render
- Notes:
- Without this setting, UI rendering will be extremely slow.
- Assumes RaceCapture is launched as pi. If not, replace pi with the user you are logging in as.
- If you're coming in to fix this after the fact, you'll need to reboot/re-login to take effect.
Enable WiFi
If you want network capability in addition to the ethernet connection, enable and configure WiFi per the official documentation
(Optional) Enable SSH
You can optionally enable SSH for remote management from the comfort of your main computer's keyboard and screen.
Enable and configure ssh per the official documentation
Install multi-touch tools
Install the packages that enable multi-touch interfaces. Enter the following at the command line:
> sudo apt-get install mtdev-tools
Configure memory split
You'll need to bump up the memory made available to the GPU. Increase the default value of 64 to 256.
- Via raspi-config tool
You can adjust the memory split by running the raspi-config tool. See the official documentation
- Editing /boot/config.txt
You can adjust the value directly by editing the /boot/config.txt file.
> sudo nano /boot/config.txt
Find the line containing gpu_mem=64 and change the number to 256
gpu_mem=256
Save the file by pressing ctrl-x then press Y to confirm.
Installing the RaceCapture app package
Download the latest RaceCapture app package for Raspberry Pi and place it in the /opt/ directory of the Raspberry Pi.
- Directly downloading to the Raspberry Pi
You can download it directly by getting the URL of the package by right-clicking the download link and copying the URL to your clipboard. Then, use it in the command below:
cd /opt
sudo wget <package URL>
Extract the package
Now extract the downloaded package :
sudo tar -xjvf <downloaded file>
Launch the app
Launch the RaceCapture app by running the following command:
/opt/racecapture/run_racecapture.sh
Launching with Watchdog
You can enable an automatic watchdog that re-launches the app in case a crash occurs.
/opt/racecapture/run_racecapture.sh -w 1
- Note: You can break out of the application by issuing Alt + PrntScn + k to the application.
You can further stop all racecapture processes by issuing the following command (e.g. via ssh)
killall -9 run_racecapture
Automatic start upon power up
To get the full dedicated dashboard experience, you can enable automatic launch of the RaceCapture app upon power up.
To do this, edit the system's startup file:
sudo nano /etc/rc.local
and add the following line before the exit 0 line.
/opt/racecapture/boot_racecapture.sh pi

exit 0
Save the file by pressing ctrl-x then press Y to confirm.
Connecting to your RaceCapture system
Powering up
- Connect the power to your display and power up.
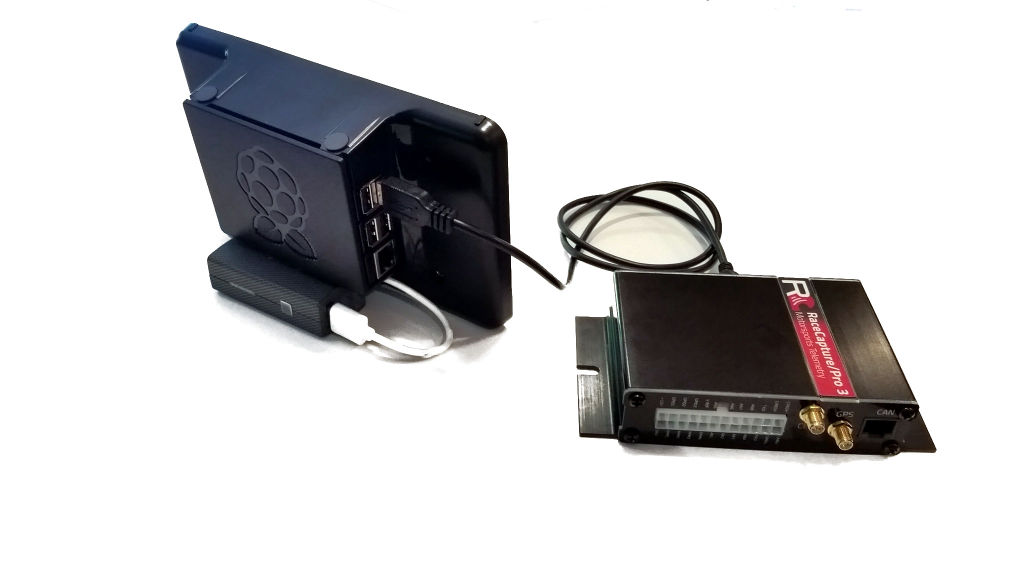
- Connect your RaceCapture/Pro or RaceCapture/Track to the Raspberry Pi using the USB cable.
- Launch the RaceCapture app by running:
/opt/racecapture/run_racecapture.sh
If you have it set to launch automatically, simply let it start upon power-up.
Connection and usage
Once the RaceCapture App is running, it will connect automatically over USB. You can use the app just as you would on Android or iOS.
Extra Features
Hardwire buttons
The RaceCapture app responds to keyboard commands for certain behaviors. You can use a USB keyboard - or a device that emulates keyboard commands - to control the RaceCapture App.
Currently there are keyboard commands for the following:
- Navigating dashboard screens - Use the left and right arrow keys to switch between screens
- Escaping from screens / menus - The Escape key can be used to exit out of screens and options, just like the 'back' button on Android.
- Acknowledging alerts - Use the following keys to acknowledge alerts, including responding to pit-to-car alerts:
- K : to indicate 'Yes' or 'OK'
- N : to indicate 'No"
Additional Tips
See this link for additional tips on how to setup the Pi and speed up the boot times. This should be especially helpful for beginners.

