DriverID Selector Switch
DriverID Selector Switch allows you to easily select which driver is driving so that you can quickly and easily see who was driving in the data later by looking at the DriverID channel. Just assign each driver a number, and tell them to turn the switch to their number when they get in.
{{#evu:https://www.youtube.com/watch?v=vGHrShqMUa4}}
Parts Needed:
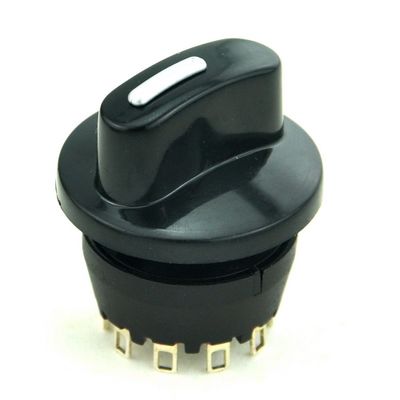
1 pole Selector Switch:
- 2 Position Switch - $10
- 3 Position Switch - Currently NA
- 4 Position Switch - $6
- 5 Position Switch - $10
- 6 Position Switch - $10
- 7 Position Switch - Currently NA
- 8 Position Switch - $10
- 10 Position Switch - $10
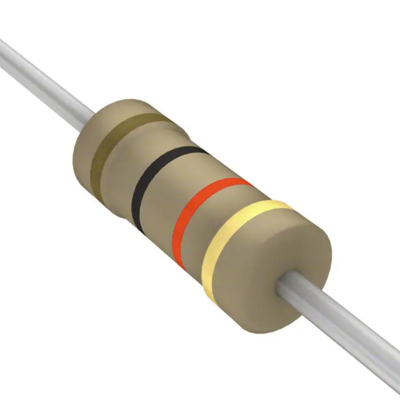
Resistors (1ea): For switches with 2-6 positions:
| DriverID | Resister | Voltage |
|---|---|---|
| 1 | 2.4K (2.2K will work) | 1.0V (0.9V if 2.2K used) |
| 2 | 3K | 1.75V |
| 3 | 4.7K | 2.5V |
| 4 | 8.2K | 3.25V |
| 5 | 22K | 4.0V |
| 6 | 150K | 4.75V |
| 10K | required for 5V voltage divider |
For switches with 7-11 Positions:
| DriverID | Resister | Voltage |
|---|---|---|
| 1 | 1K | 0.45V |
| 2 | 1.5K | 1.0V |
| 3 | 1.8K | 1.5V |
| 4 | 2.2K | 1.97V |
| 5 | 3.3K | 2.48V |
| 6 | 5.1K | 3.0V |
| 7 | 8.06K | 3.48V |
| 8 | 16.9K | 4.0V |
| 9 | 51K | 4.5V |
| 10 | 1M | 4.95V |
| 11 | 16 Ohm | 0.0V (If you need an 11th driver move this to Driver1 and all others down one position) |
| 10K | required for 5V voltage divider |
You can get these resisters from Digi-Key.com and search by resistance. Try to get as close as possible.
If you get different resisters than ones above, you can use this link to figure out what the output voltage will be. Set Vs to 5V, R1 to 10K. For R2, take the resister you have and add all of the resisters before it, to get the total resistance. It will calculate Vout for you. Use this to map your sensor inputs in Race Capture App.
http://www.ohmslawcalculator.com/voltage-divider-calculator
Wiring
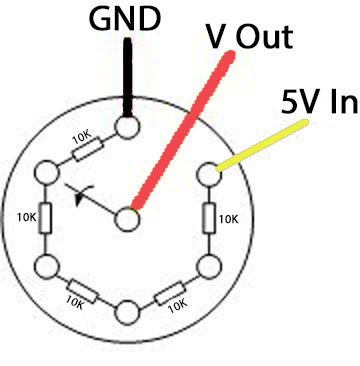
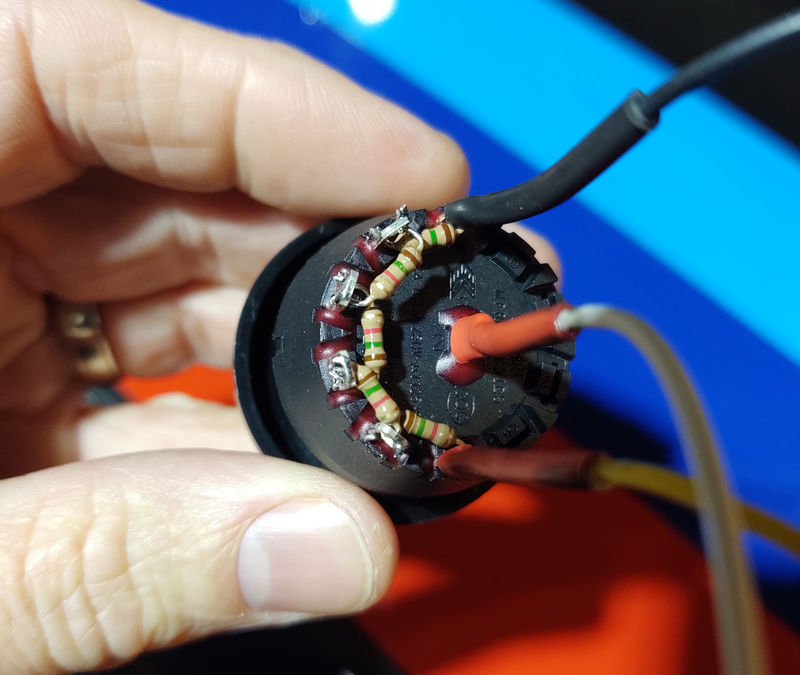
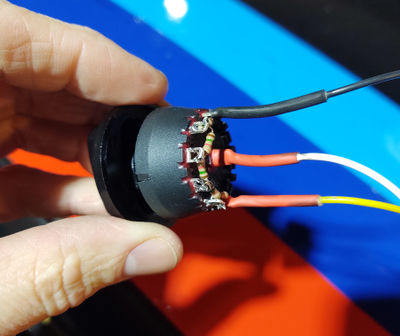
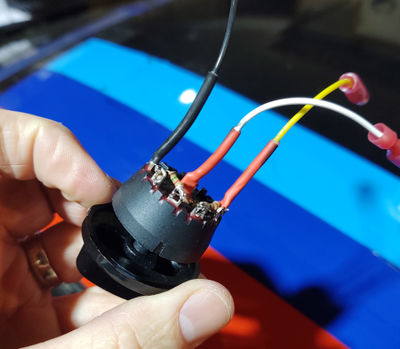
- Solder the resister for Driver 2 between switch position 1 and switch position 2, down low on the posts
- Solder the resister for Driver 4 between switch position 3 and switch position 4, down low on the posts
- Solder the resister for Driver 6 between switch position 5 and switch position 6, down low on the posts
- Solder the resister for Driver 3 between switch position 2 and switch position 3, up high on the posts
- Solder the resister for Driver 5 between switch position 4 and switch position 5, up high on the posts
- Solder the resister for Driver 1 onto switch post position 1, sticking up
- Solder a 2 wires to the other side of of the resister for Driver 1. One wire for 5V in (yellow in pic above), and one wire for RCP Analog input (white in pic above)
- Solder the 10K resister inline with the 5V wire (yellow in pic above)
- Solder ground wire to the center post
- Use heat shrink tube to protect the wires
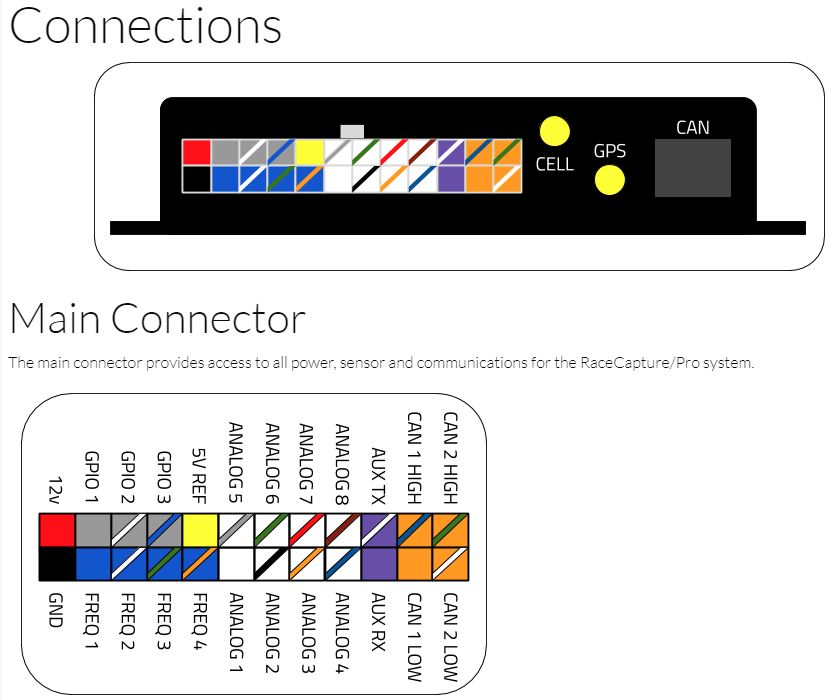
Install the switch and wire the ground wire (black in pics above) to ground. The wire with the 10K resister is the 5V In (yellow in pics above), wire it to 5V Ref. The other wire connected to the Driver 1 resister (white wire in pics above) goes to an RCP Analog Input.
Race Capture Settings
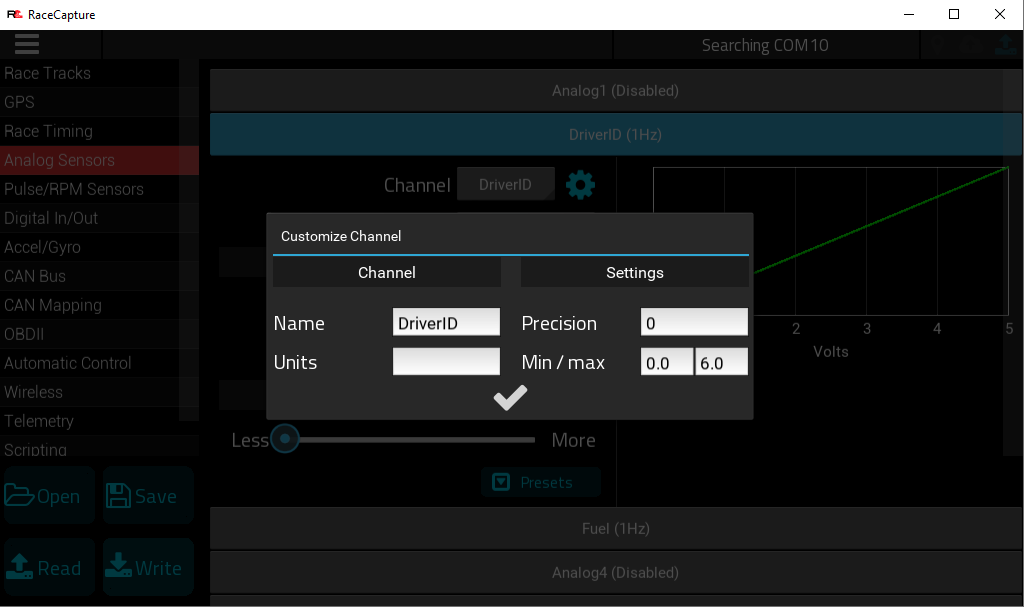
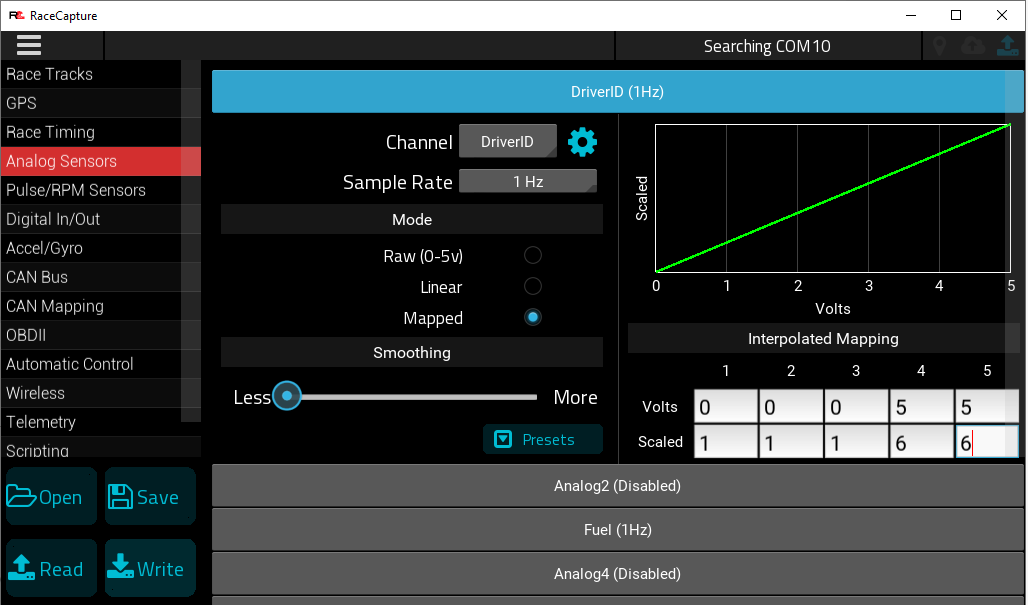
Edit the Analog input channel that you wired the DriverID Switch to. Click the gear icon and change the name to DriverID, set Precision to 0, Min to 0, and Max to however many positions your switch has. Set the Sample Rate to 1Hz.
For Mode, select Mapped. If you have a 2-5 driver switch, use the voltage values in the table above that correspond with the each Driver number. If you have less than 5 drivers, copy the last driver value to the remaining positions.
If you have more than 5 drivers, you will need to input the 1st and last driver values in the the 1st and 5th cells in the race capture mapping table. You will then pick 3 other driver/voltage pairs from the table above, spreading them out as evenly as possible.
Write the config to Race Capture and test the switch with the dashboard.
If it does not work properly, go back to the settings, change Precision to 2 and change the Mode to Raw. Write the config, and test again. Write down the Voltage for each position on the switch. If any do not match up with what is in the table above, go back and input that value in the Race Capture mapping table in an appropriate cell location. Change the Precision back to 0 and Mode back to Mapped and test again. Rinse and repeat.
See the Calibrating Sensors Guide for more info on how to map sensors properly.

