RaceCapture troubleshooting
If RaceCapture isn't operating as expected, there are a few places to inspect that can help understand what's going on.
System Status
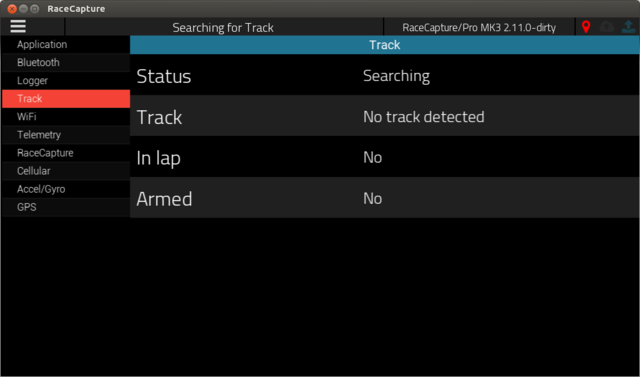
The System status page provides information on the status of various parts of the RaceCapture system.
- Ensure the RaceCapture app is connected to RaceCapture
- In the RaceCapture app press the top menu button and select 'System Status'
CAN bus troubleshooting
See the comprehensive CAN bus troubleshooting guide to diagnose issues receiving CAN bus data.
SD card logging
Not logging (Solid Red Error LED)
- Ensure the card is installed with the label facing the top of the unit, metal contacts facing down
- Use a high quality, high speed 32GB or smaller SD card.
- Freshly format the card to FAT32
Corrupted data (not valid CSV data)
- Ensure the card is freshly formatted to FAT32 and empty
- Try a different card
Inconsistent Logging at high logging rates (Flickering Red Error LED)
- Use an SD card with a faster speed grade
- Try a fresh format to reduce fragmentation
RaceCapture Log
The RaceCapture hardware will generate messages that can provide insight into specific problems.
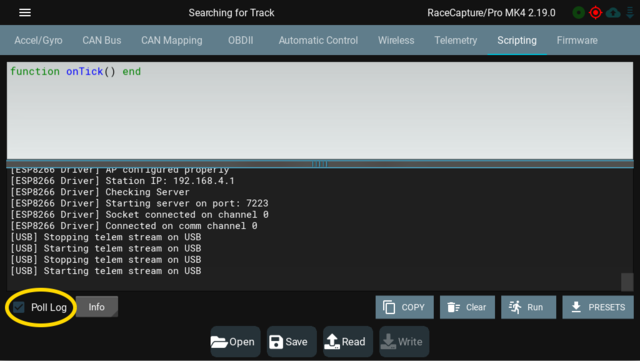
To access the RaceCapture Log
- Ensure the RaceCapture app is connected to RaceCapture
- Navigate to Setup and then select the Scripting screen (RaceCapture/Pro and RaceCapture/Apex) or the Logs screen (RaceCapture/Track)
- Check the box next to Poll Log at the bottom of the screen.
- The RaceCapture app will periodically query RaceCapture for log information. The log window will show messages from RaceCapture - scan these message for any errors. You can also copy the text in the log for future reference by pressing the Copy button.
Application Log
The RaceCapture app itself generates it's own log messages, separate from the RaceCapture hardware.
To access the application log:
- Navigate to the System Status page
- Select the Application section of the page
- Press the Copy button. This will copy the current application log to the system's clipboard.
- Paste the log into an email or document to review it's contents.
Saving your configuration
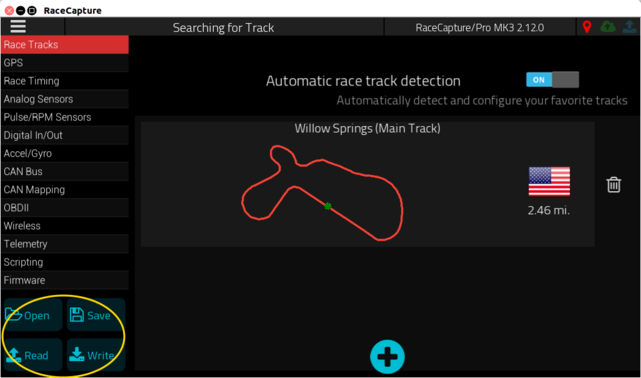
Periodically you will need to save your configuration as a backup or for sharing.
To save your configuration to a file:
- Launch the RaceCapture app
- Connect your RaceCapture system to the app
- Navigate to Setup view.
- Press the Read button to read the current configuration
- Press the Save button to save the current configuration to the file you specify.
The saved RaceCapture configuration file will have the extension '.rcp'.
Factory Reset for RaceCapture
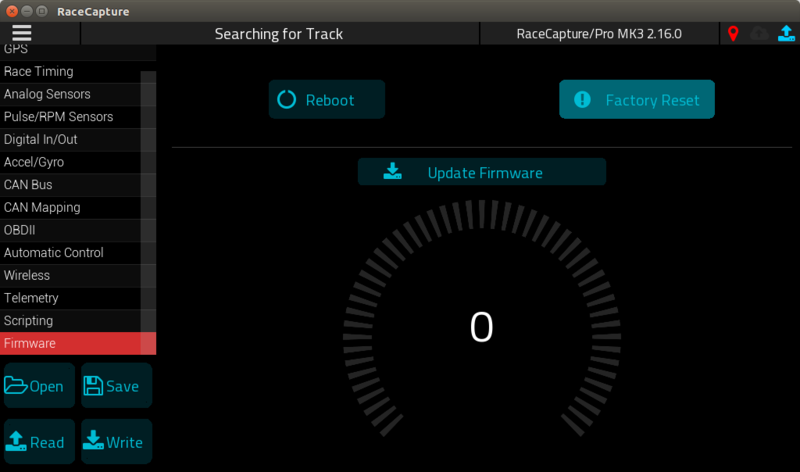
From Setup / Firmware
The easiest way to reset to factory defaults is to access the Firmware update view.
- Connect your RaceCapture system via any supported connection
- Go to Setup / Firmware.
- Press the Factory Reset button.
Command line console
- Close any running RaceCapture app
- Launch a serial terminal program such as RealTerm or HyperTerminal (Windows), Minicom (Linux or OSX), and connect to the serial port assigned to RaceCapture.
- Press Return on keyboard to see a list of commands.
- Issue the command 'resetConfig'
- Your RaceCapture system will be restored to a factory default configuration.
Flashing an older firmware
- Flash a previous firmware that changes the major or minor version (major.minor.bugfix). This triggers an automatic factory reset.
- Example: If you are on 2.13.5, flash 2.12.0.
- Then, you can re-flash the original firmware.
- Your RaceCapture system will be restored to a factory default configuration.
Note: If the RaceCapture App cannot connect to your device, then you may need to load a previously saved configuration to access the firmware update menu.
Resetting the analysis data store
If you need to reset the data storage used for the analysis mode, follow these steps:
- Determine the location of the datastore file
The datastore file is called datastore.sq3 and is stored in the user's storage for the RaceCapture app. This file is stored in a different location based on the operating system you are using.
To find it's location, launch the RaceCapture app and immediately go to the System Status view and press the Copy button to copy the application log file to the system's clipboard.
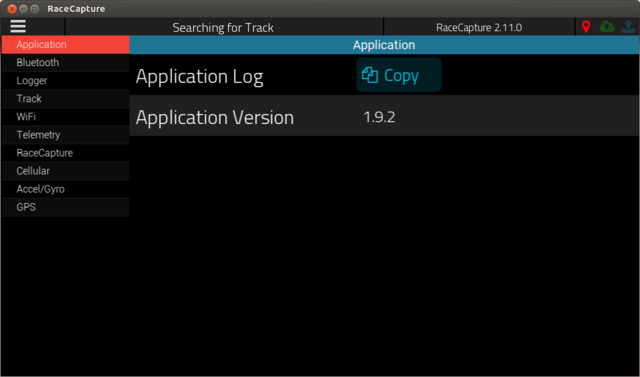
Open notepad or similar text editor and paste the RaceCapture app's log.
You will find the location of the datastore in the log messages, starting with the phrase Datastore Path: . Make a note of this path.
Example:
...
[Base        ] Start application main loop
[UserPrefs   ] Saving preferences
[Main        ] Datastore Path:/home/susy/.config/racecapture/datastore.sq3
[Main        ] initializing datastore...
[RacecaptureApp] initializing rc comms with, conn type: Serial
[RCPAPI      ] msg_rx_worker starting
[RCPAPI      ] cmd_sequence_worker starting
[RCPAPI      ] auto_detect_worker starting
...
- Backing up and removing the current datastore.sq3
Browse to the location you previously noted. You should find a file called datastore.sq3.
Move this file out of the current directory, to a separate location for safe keeping, if necessary. If you do not have a need for the old datastore, you can safely remove it.
- Re-launching the RaceCapture app
Now, re-launch the RaceCapture app. The RaceCapture app will create a fresh, empty datastore.sq3. You can now import your logs as needed.
Hardware troubleshooting
RaceCapture/Pro
Stuck in bootloader mode
If your RaceCapture/Pro seems to be stuck in bootloader mode (rapidly orange flashing light (MK3) and app cannot connect), you may have a stuck button on the front panel. Normally the bootloader is activated while holding down the front button while powering up, but if the button is stuck, the unit will go into bootloader mode unexpectedly. Check if the button has been pushed down excessively on an edge; use a fingernail or tool to pull the edge up.
- Note: When you press the button, you should feel a click when the switch engages.
Diagnosing Analog Inputs
Steps to verify the proper operation of analog inputs for RaceCapture:
- Perform a factory reset by navigating to Setup / Firmware and pressing "Factory Reset" while connected to RaceCapture.
- This will reset the system to factory defaults. Ensure your settings are saved so they can be later restored.
- Connect the system to 12v power.
- For each analog input in question:
- Disconnect any sensor connected to the analog input
- Enable the Analog channel in question by selecting a sample rate 1Hz or higher.
- Connect a jumper wire between the analog input and ground. On the RaceCapture dashboard verify the channel shows very close to 0v (within 0.1v)
- Connect a jumper wire between the analog input and the 5v reference. On the RaceCapture dashboard verify the channel shows very close to 5v (within 0.1v)
- Notes
- It is important the system is connected to 12v power so you see the full 0-5v range of the sensor input. If only connected to USB power, the max voltage input will read 4.6-4.8v.
- RaceCapture inputs are buffered with very high impedance to avoid affecting the signal they are reading, much like a test instrument. If left disconnected, they will float and show a reading between 0 and 5v.

