PodiumConnect
Getting Started
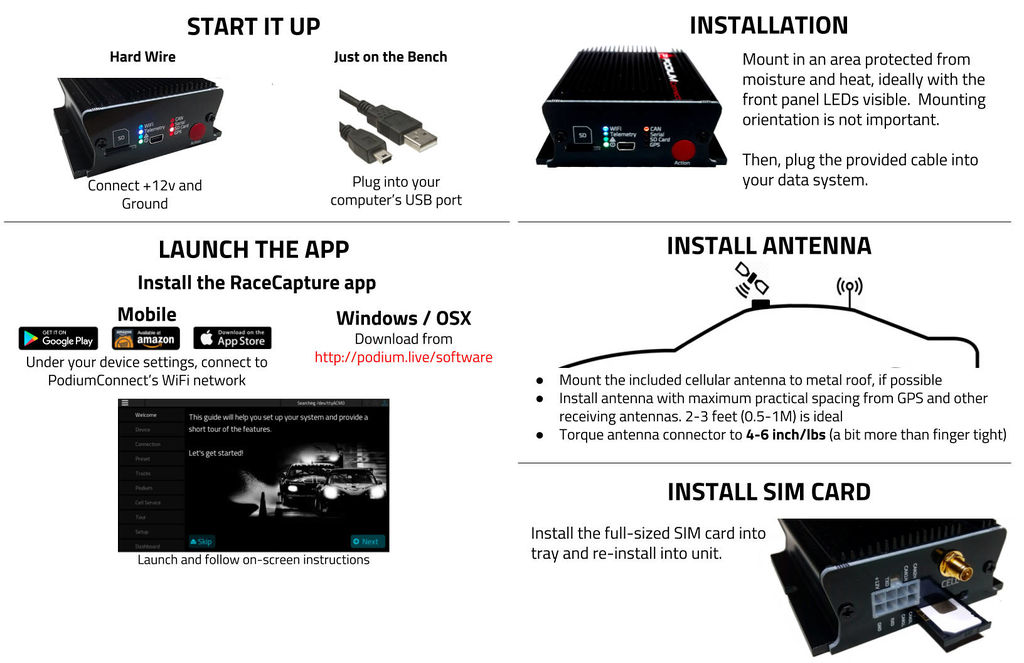
Installing the app
Windows / OSX
Get the latest version of the RaceCapture app from the downloads page
Android / iOS
Running and Connection
Windows / OSX
- Connect your PodiumConnect to your computer with the USB cable,
- If you are running Windows older than Windows 10, please install the USB driver, available from the Software Downloads page
- Start the RaceCapture app.
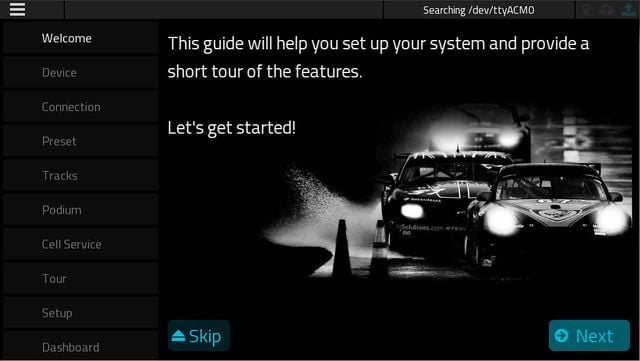
- The RaceCapture app will launch the first time setup wizard.
Android / iOS
- Power up PodiumConnect with 12v or via USB power (computer or USB power source)
- Go to your device's WiFi settings, and connect to the PodiumConnect WiFi access point.
- Note, the WiFi Access Point is open, with no password - you can set a password and encryption later under Setup.
- Start the RaceCapture app.
- The RaceCapture app will launch the first time setup wizard.
First time setup wizard
The first time setup wizard will guide you through the essential setup of your PodiumConnect
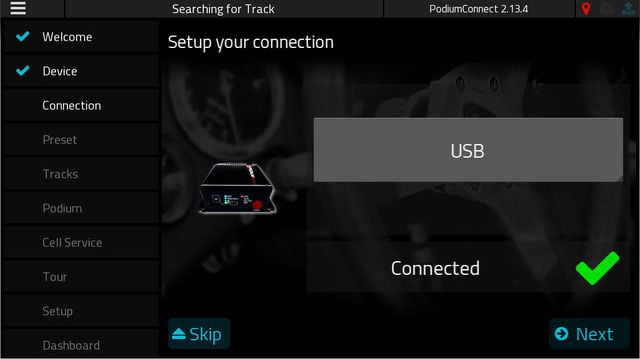
Verifying Connectivity
- Select your device and verify the RaceCapture app connects.
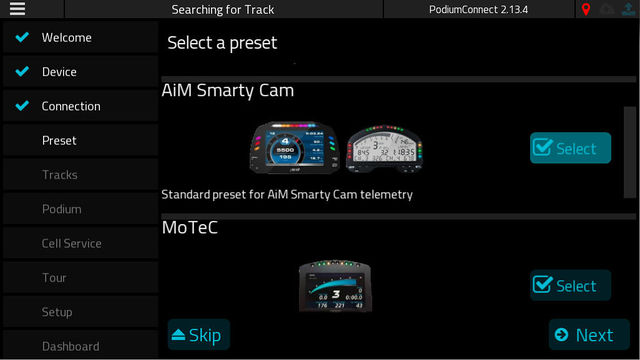
Select your Preset configuration
- Select the preset configuration matching the data system you have.
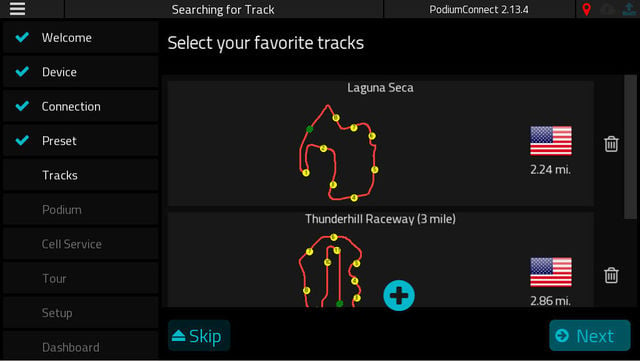
Select your favorite Tracks
- Select the tracks you will typically race at so PodiumConnect can detect the track location and calculate lap times.
- This is an important step to ensure you get valid data and lap times for your telemetry session.
- Note: Only select the one track configuration per race track, to ensure the correct track is auto-selected.
- If you don't see your track listed, please submit your track!
Create an account on Podium & Setting Device ID
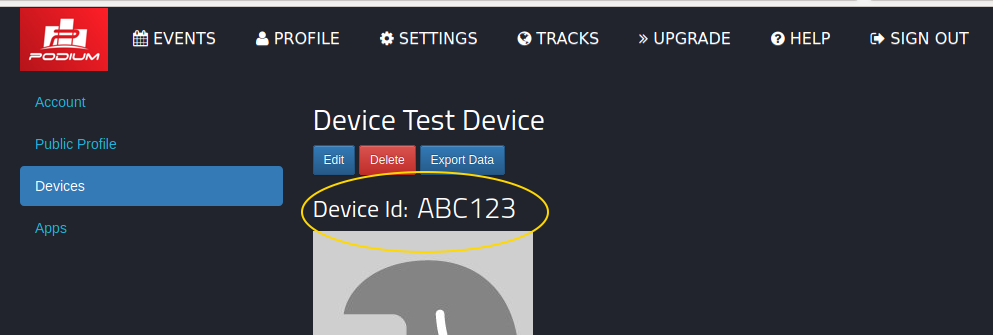
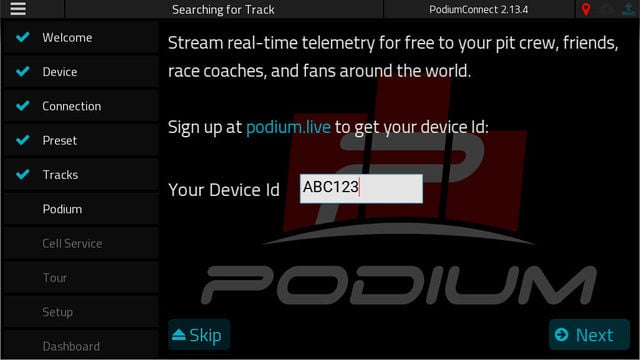
- Create an account on Podium http://podium.live - then follow the steps to create a Device. Make a note of the Device ID provided, so you can enter it into the wizard.
Then, enter this Device ID into the Setup Wizard.
- Note: You can set the Device ID later under Setup / Telemetry
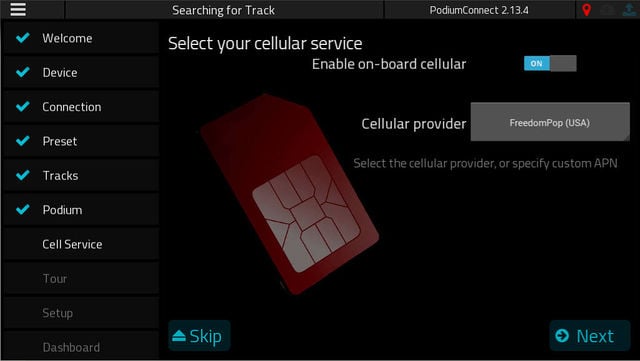
Select your cell provider
- Enable the cellular connection and select your cellular provider.
- Note: If your cellular provider is not in the list, select the custom option and set the APN settings provided by your cellular carrier.
Verizon
If you have the newer 4G enabled system, you can use a Verizon SIM card (USA). When visiting the store, ask for a data only SIM card for a hotspot or tablet
- If your unit was bundled with a SIM card, you can call Wireless Zone at 508-834-3311 for activation and access to special data plan options.
- Note - If you have a 3G system, Verizon is not available for telemetry. Your best options are AT&T, T-Mobile or FreedomPop. Check your order details if you are not certain which unit you have.
AT&T
You can get an AT&T SIM card at your local AT&T store. Request a data SIM suitable for a data only tablet or hotspot.
Freedom Pop
If you have a FreedomPop card, activate your card on the FreedomPop activation website
What if the store is asking for the IMEI?
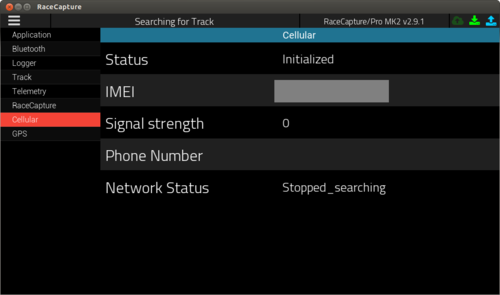
Usually the store will set a default IMEI number, especially if you tell them the SIM may be swapped between devices. If they require setting a real number, you can get the IMEI by connecting to RaceCapture/Pro and checking the cellular section of the app's System Status page:
Further Setup
The settings made in the first time setup can also be accessed via the Setup view of the RaceCapture app.
- Note To re-run the first time setup, launch the RaceCapture app without a connection to the device, go to the setup screen and press the First Time Setup button.
Connecting your Data System
Minimum Data required for proper operation
At minimum, PodiumConnect requires the following data from your data system:
- Speed
- Configured with 2 digits of precision in the CAN mapping (e.g. 33.24 kph)
- Latitude
- Configured with 6 digits of precision in the CAN mapping
- Longitude
- Configured with 6 digits of precision in the CAN mapping
- Note: These channel names must be defined exactly as above in the CAN bus mapping
This minimum data will allow PodiumConnect to calculate lap timing, which creates the context for analysing additional sensor data, such as temperatures, TPS, RPM, oil pressure and so on.
- Important: Without these channels, telemetry will not work properly. Please do not change the names of the default channels provided by the presets.
Data System Integration Guides
Use the provided integration cable and connect it to your data system.
Follow the guide for your specific system:
Hardware integration / custom cable
PodiumConnect MK2
AIM integration cable
If your system was provided with the AIM integration cable, connect it to AIM data hub.
Pigtail harness
- Connector: M8 4P, A coding
Male connector pictured
| Pin | Connection | Notes |
|---|---|---|
| 1 | CAN low | White |
| 2 | Power | Red, 9-24v / 1A (~12W) |
| 3 | CAN high | Green |
| 4 | Ground | Black |
Power is standard automotive 12-14v (nominal).
PodiumConnect MK1
The main connector on PodiumConnect MK1 is a standard Molex MiniFit Jr connector.
- Plug Housing: Molex Mini Fit Jr. (8 position) 0039012080
- Compatible Pins: Molex 39000039
Adjusting your Channel Mappings
You may need to adjust or remove unused channels loaded by the preset.
- Navigate to Setup / CAN Mapping screen.
- Remove or adjust channels as appropriate.
- Press "Write" to write the settings to PodiumConnect
Testing Telemetry
Install your SIM card
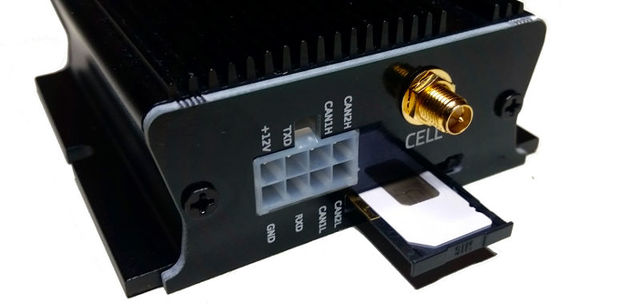
- On the rear of the unit, pop the SIM card drawer out of the unit by pressing the ejector button with a ball point pen.
- Install the SIM card into the tray, with the gold contacts facing up.
- Slide the SIM card tray back into the drawer, ensuring you engage the drawer slot carefully. Press gently until the drawer seats.
Verifying
- Power up PodiumConnect and attach the cellular antenna. Torque the antenna just beyond finger-tight (do not overtighten). 4-6 inch/lbs.
- Watch the telemetry LED on the front of the unit. When it begins to flash regularly, this means telemetry is broadcasting.
- Open your Podium account and navigate to http://podium.live/home
- Refresh this page when telemetry is broadcasting; you will see an Ad Hoc event listed.
- Click this link, which brings you to a page showing all devices at the event. (yours will be the only one).
- Click the name of your device. This will show the main race dashboard page.
- Here, you will see live data flowing from PodiumConnect.
=Using an SD card for telemetry buffering
To enhance telemetry performance, you can optionally use an SD card to buffer data in cases where cellular connectivity temporarily drops while on the race track.
If this happens, PodiumConnect will save data to the SD card, and then will burst the data upon re-connection. The amount of buffering provided is limited to approximately one lap (3 minutes of data). Therefore, this buffering is optimized for race tracks with small to moderate interruption of cellular coverage.
Enabling SD card buffering
- Obtain a micro SD card, 32 GB or smaller
- Perform a fresh FAT32 format in your computer. This is an important step, even if the SD card is brand new.
- Insert the SD card into the front of the unit, ensure it clicks/latch into place.
Installing the unit
Install PodiumConnect in the passenger compartment, in an area that's protected from moisture and temperature extremes. A good location is an area that offers reasonable access to the unit to observe status LEDs,
- Note Mounting orientation does not matter.
Installing the cellular antenna
Install the cellular antenna on the roof of the vehicle in a location as far away from receiving antennas as reasonably possible - e.g. opposite side of the roof from the GPS antenna.
Temporary alternative (reduced performance): You can also install the antenna to the windshield using a suction cup, or in the passenger compartment using zip ties, ensuring the antenna body of the antenna is 8" separated from metal structures.
Using Podium
Visit the guide on using Podium, which includes a video tour of the essential features.
Updating Firmware
Below are the steps for updating your firmware.
Backup your configuration
Updating firmware can cause your PodiumConnect system to be restored to factory settings. Before updating firmware, save your settings to a file.
Steps:
- Connect to PodiumConnect using the RaceCapture app - using USB, or WiFi.
- Navigate to Setup and press the Read button to read the current settings from PodiumConnect.
- Press Save to save your settings to a file. These will be later restored after firmware is updated.
Download the PodiumConnect Firmware
- Download the latest PodiumConnect firmware from http://podium.live/software
- Unzip the archive to a location on your computer.
Update the PodiumConnect Firmware
- Connect PodiumConnect via USB (Windows or OSX only)
- In the RaceCapture app, navigate to Setup and press the Firmware menu option.
- Press the Update Firmware button
- Navigate to the PodiumConnect firmware you unzipped. The file will end with the extension '.ihex'. Example: PodiumConnect_2.15.2.ihex
- Press Open
The firmware update process will begin, and will complete when the gauge is 100%
After re-connecting, the firmware version should be updated in the connection message at the upper right-hand corner.
Restore your settings
- Navigate to Setup and press Open.
- Select the previously saved settings file, and open the file.
- Press Write to write the settings back to PodiumConnect.
Recommended Cellular Services by country
- UK: Telefonica O2
- Italy: Vodafone Italy
Additional Guides and How-Tos
Guides
- Logging Data
- AIM Integration guide using CAN Mapping
- Real-time Telemetry guide
- Lua scripting guide
- Lua script examples
- GoPro control guide
- General troubleshooting guide
- Creating video with RCP data overlay using DashWare
- Exporting to RaceRender guide
- Data Analysis in Podium to become a faster driver
- Automating Tablets/Phones for use as Dashboards Guide
- Add TPMS data for $225
How To
- How to: enable Predictive Timing
- How to control which gauges show up on Podium.live
- How to: Use Race Capture App (some features are specific to Race Capture Pro)
- How to: Submit a new race track
- How to: enable OBD2 channels
- How to update firmware
- How to add video to Podium.live
- More FAQs and How-To's
- How To Videos
Specifications
| Analog Inputs | |
| Channels | 1 (Battery Voltage, Internally connected (0-20v)) |
| CAN Bus | |
| CAN Channels | 2 |
| CAN baud rate | 125K, 250K, 500K, 1M Baud |
| CAN filters | 14 per channel |
| Protocol Support | OBDII PID, custom CAN mapping |
| CAN Bus | CAN 2.0 compatible, 1M baud |
| CAN termination | Software controlled |
| CAN channels supported | 100 |
| Serial | |
| Aux Serial | RS232 |
| Max Baud Rate | 230400 |
| Cellular Telemetry (Optional) | |
| Cellular | 3.5G GSM worldwide compatible |
| Maximum Sample Rate | 10Hz (1/5/10Hz supported) |
| Wireless | |
| WiFi | 802.11bgn |
| WiFi Modes | Access Point, Infrastructure |
| Maximum Sample Rate (dashboard link) | 50Hz |
| Storage | |
| Micro SD | Up to 32GB (SDHC) |
| Maximum Sample Rate | 100Hz |
| Predictive Lap Timing | Built-in |
| Track Mapping | Circut and point-point |
| Track maps | 200 built in for autonomous auto-detection |
| Sectors per track | 20 |
| Analysis | Included in the RaceCapture App, and on Podium |
| Export data format | Plain CSV (RaceRender compatible) |
| Scripting / Customization | |
| Real-time virtual (math) channels / custom channel mapping | Via on-board Lua scripting |
| Virtual Channels | 100 |
| Physical | |
| Dimensions | 85 x 85 x 36mm (3.35 x 3.35 x 1.41in) |
| Temperature range | 0 to 65c |
| Environmental | IP50 rated |
| Weight | 170g (6 oz) |
| Physical | Molex Connector, 8 pins SMA for cellular module |
| Power Consumption (max) | Main System: 0.6W
With Wireless: 1.6W With Cellular Telemetry: 8.6W With Cellular Telemetry and Wireless active: 9.6W |

